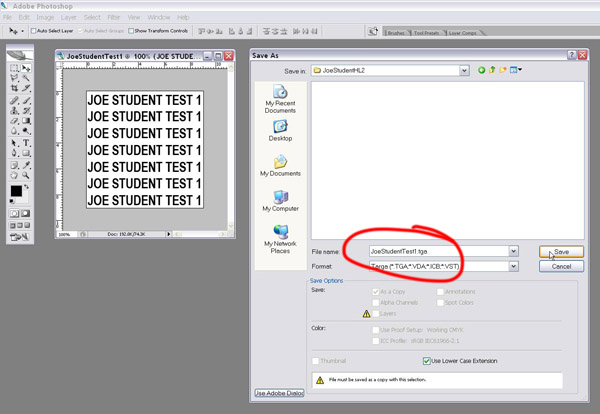
2. Save it as a *.tga file.
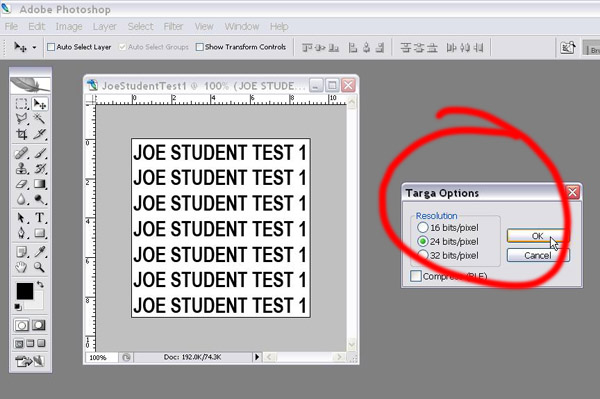
3. 24 bits/pixel (use 32 bits/pixel if your image has an alpha chanel).
TUTORIAL: MODEL WITH COMPLEX COLLISION
FROM 3ds MAX 7 TO GARRYS MOD FOR HL2
By Russell Lowe
BEFORE WE BEGIN: Download and extract this file.
1. You'll need to install the smdimp.dli and SMDLEXP.DLE plugins into the C:\3dsmax7\plugins folder.
2. Run the StudioCompilerInstaller.v0.3a.exe (make sure you put the name of your computers steam account into the username part of the destination folder).
3. Replace the StudioCompiler.exe file generated in step 2.
(found in C:\Program Files\Valve\Steam\SteamApps\username\sourcesdk\bin) with the one included in the zipped file.
1. Creating a texture.
2. Modeling, texturing, skining and exporting the reference model.
3.
Modeling, texturing, skining and exporting the collision model.
4. Compiling the texture and models.
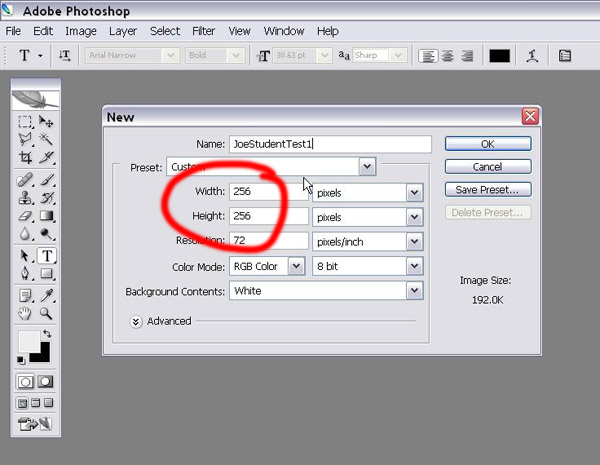
1. Create a texture for your model in PhotoShop or similar image creation software like the GIMP. Width and height should be powers of two.
2. Save it as a *.tga file.
3. 24 bits/pixel (use 32 bits/pixel if your image has an alpha chanel).
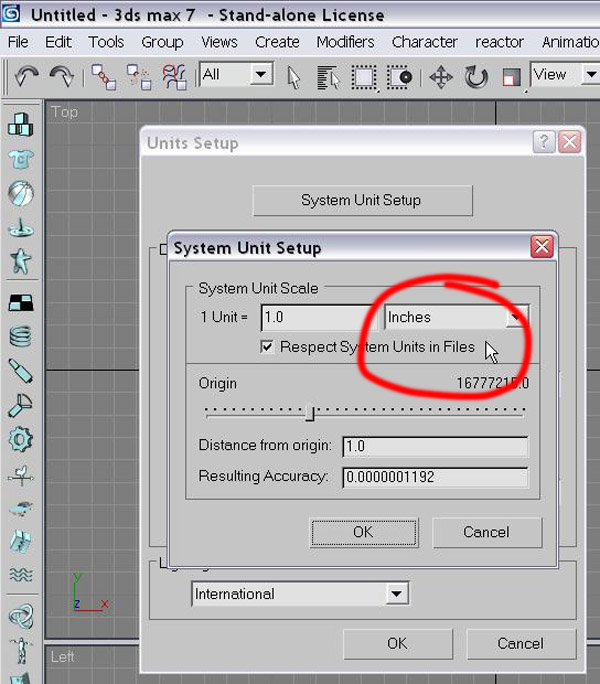
4. Open 3dsMax7 and set your units so they are the same as HL2 and GMod.
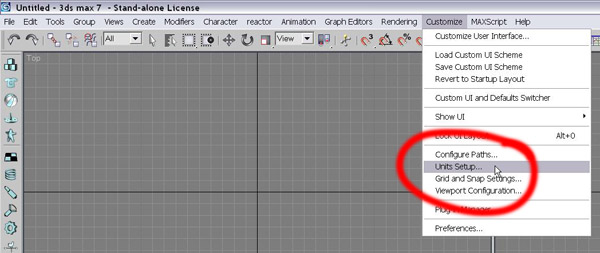
5. Units Setup "generic" and System Units Setup "inches".
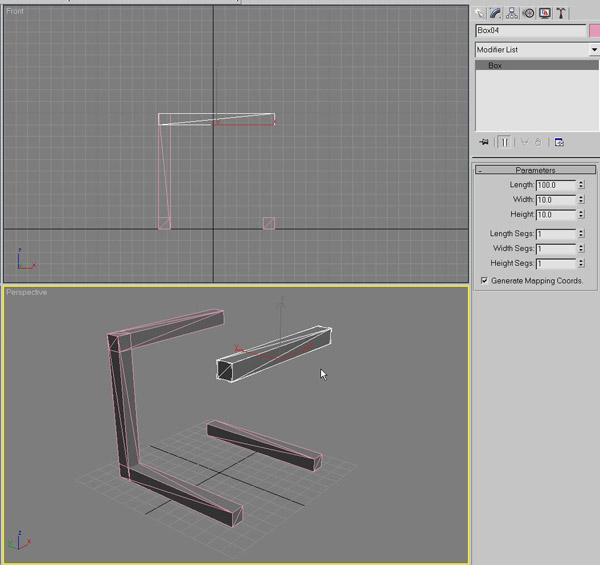
6. Make a simple structure that is slightly taller than a characters standing height in HL2 (i.e. slightly more than 81 units). This one is made using the "box primitive" on the standard "create" panel.
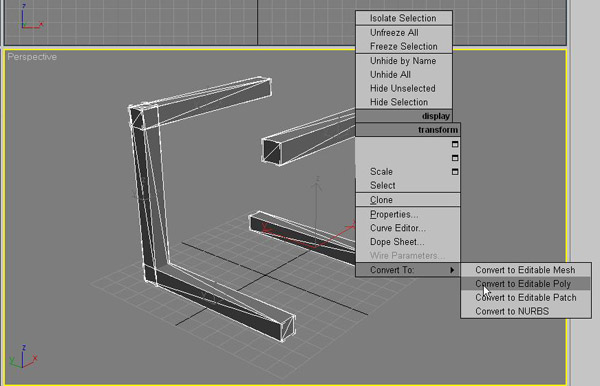
7. Select all of the individual objects and convert them to editible polys.
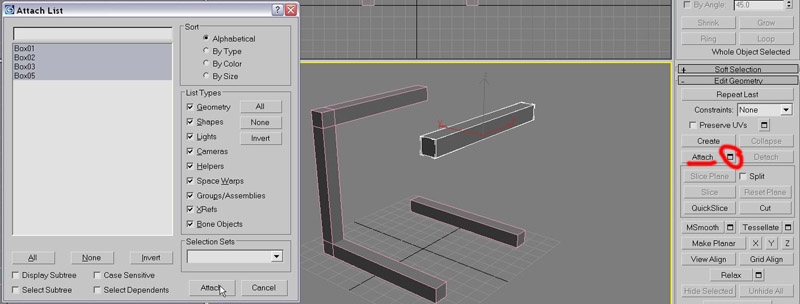
8. Select one of the box objects. Under the "modifiers" tab and under "edit geometry" select "attach list". Choose all of the other objects and "attach' them. This creates one "object" that is now made up of multiple "elements'.
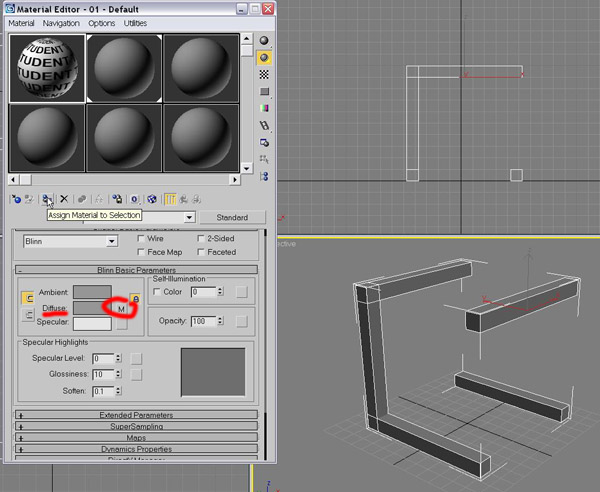
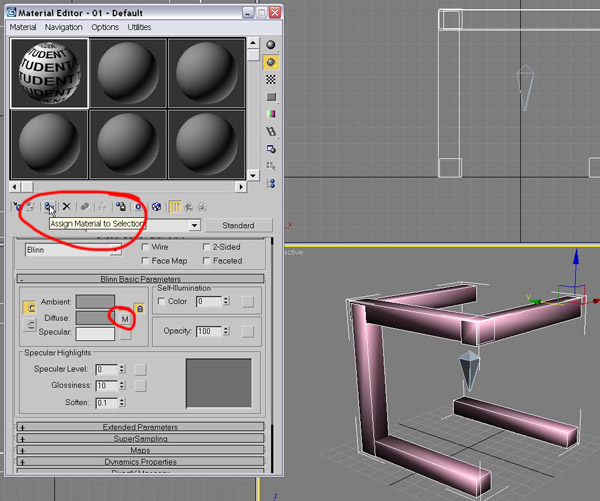
9. Apply the texture you made earlier to a standard material in its diffuse colour chanel. Do this by selecting the "map" button (to the right of the diffuse colour chanel "picker), then choose "bitmap" then navigate to your image and press o.k. Then assign the material to your object. You should also apply a "UVW" map modifier to your object (all standard primitives have UVW coordinates assigned by defalut but editible meshes created in programs outside 3ds max might not).
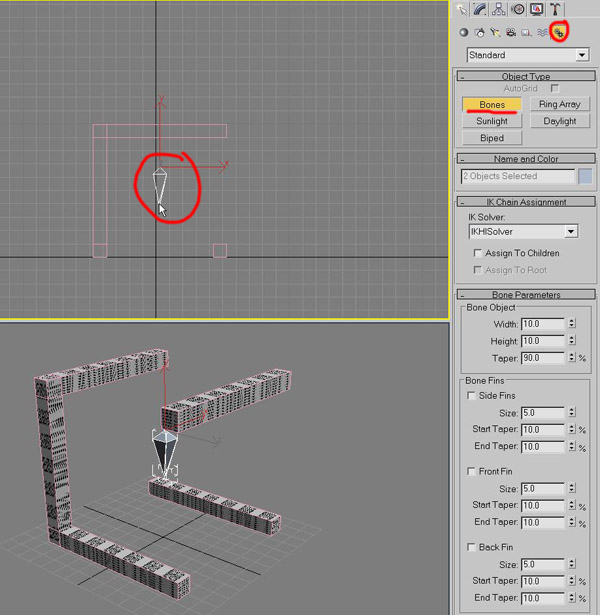
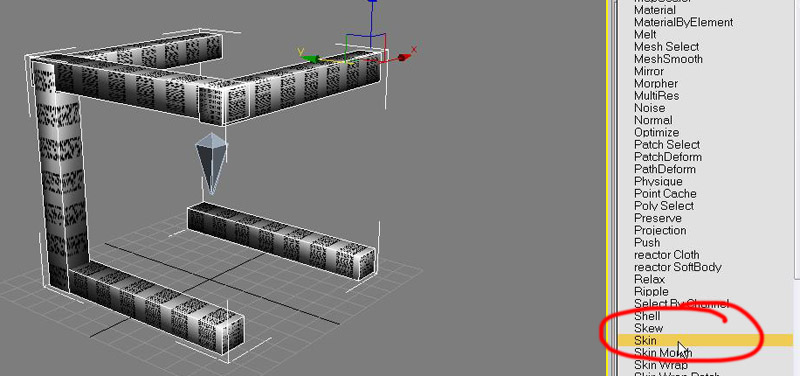
10. Under the 'Systems' panel select the 'Bones' button. Create a single bone roughly at the center of your object. Do this by left clicking and draging the cursor, as soon as you click the cursor to complete the first bone it will start to create a second bone so push escape to stop creating bones, turn off the 'Bones' button and then select and delete the second bone. Note you can see the results of the texture "mapping" on the surface of the object.
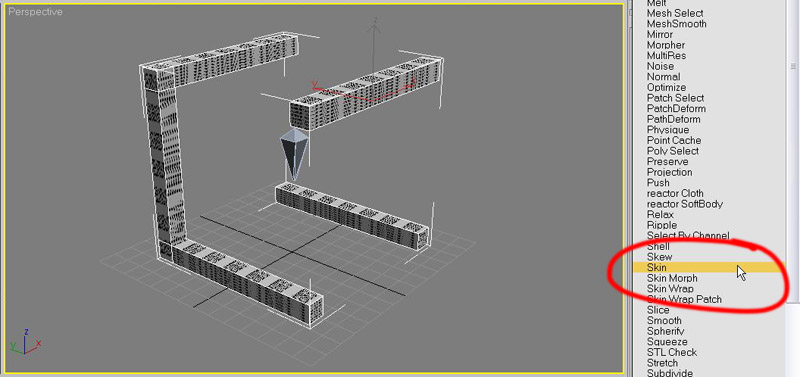
11. Select you object and under the modifiers rollout select "skin".
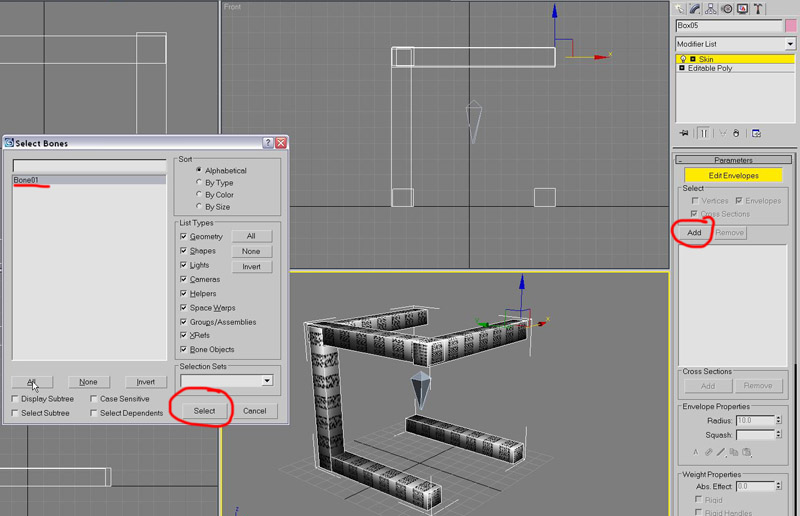
12. Click "Add" under the parameters of the skin modifier and select the bone.
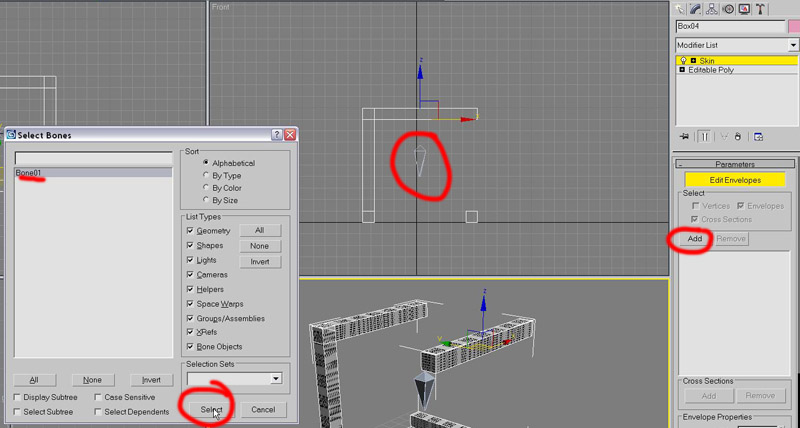
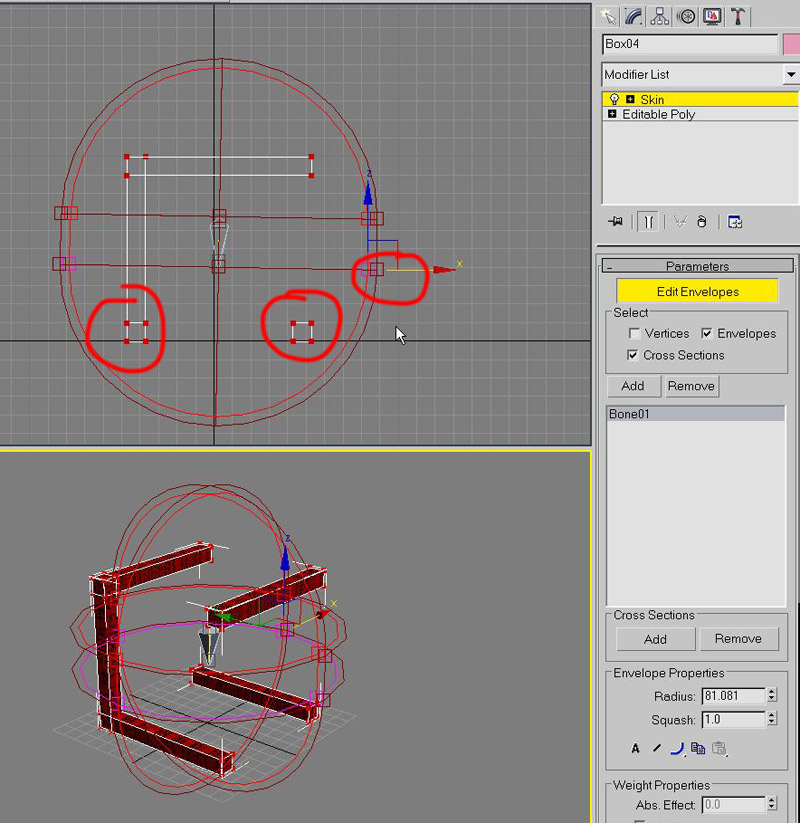
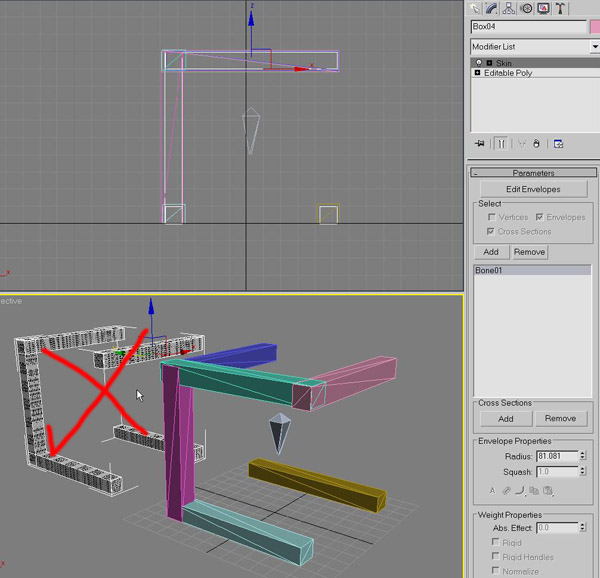
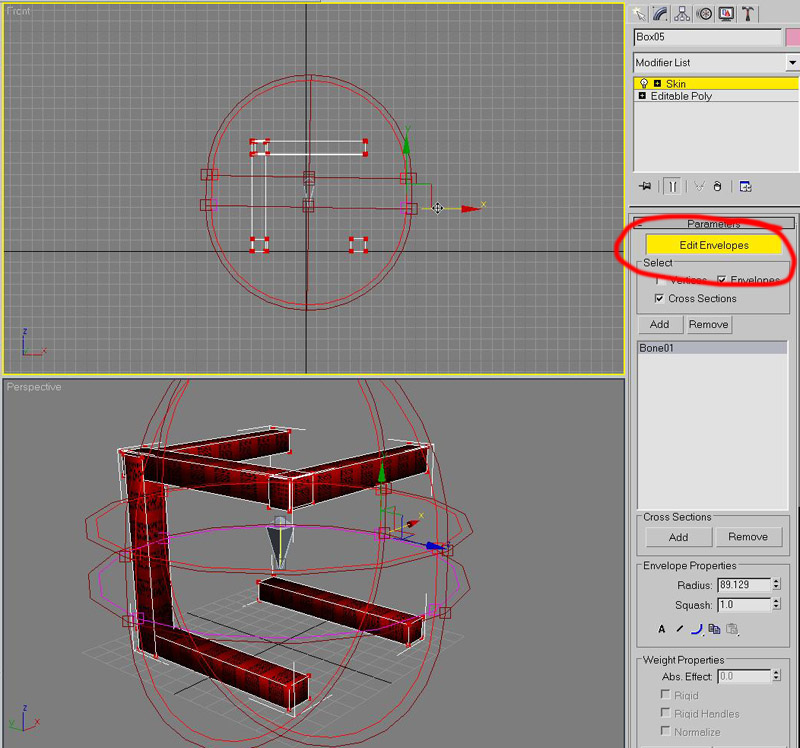
13. Click the "Edit Envelopes" button to adjust the envelope of the bones influence. All of the verticies of the object should glow red, this means they are 100% influenced (or esentially fixed) to the bone.
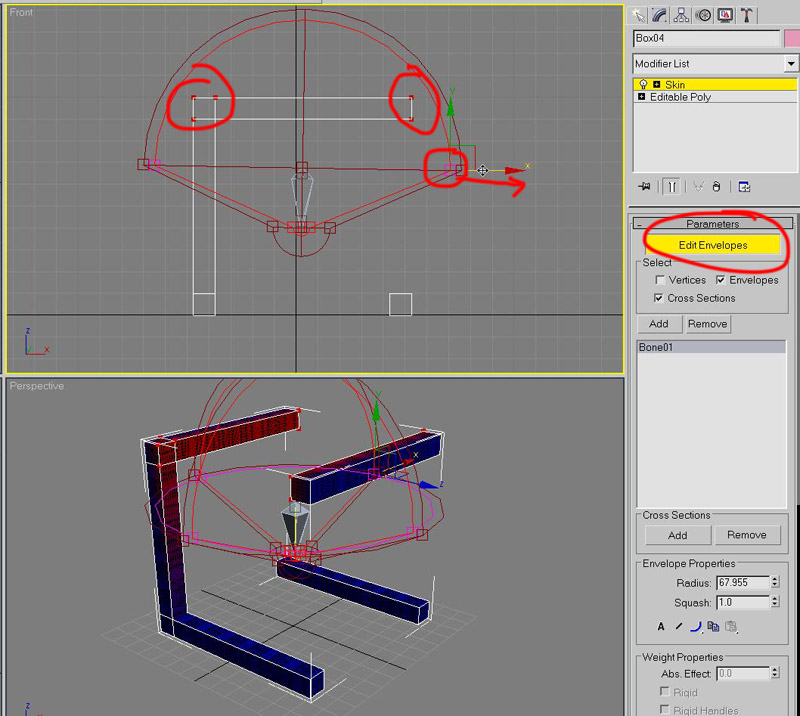
14. Do the same with the bottom controller.
15. Now we are ready to export the the reference mesh. This is the mesh that will control what we see in game.
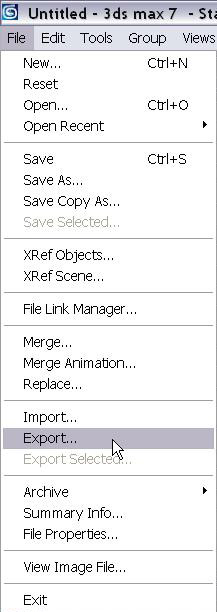
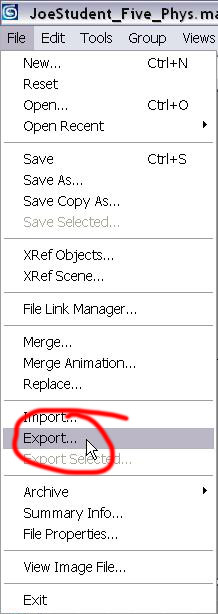
16. Export it using the Valve HL2 SMD exporter for 3ds Max 7.
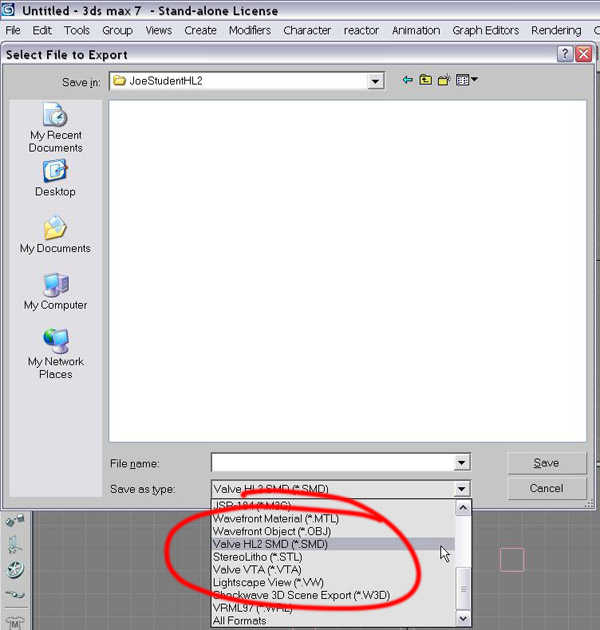
17. I've called mine JoeStudent_Five because it has five elements and JoeStudent is my name for the day. There are no hard rules about file nameing but aim for consistency, logic and scalability.
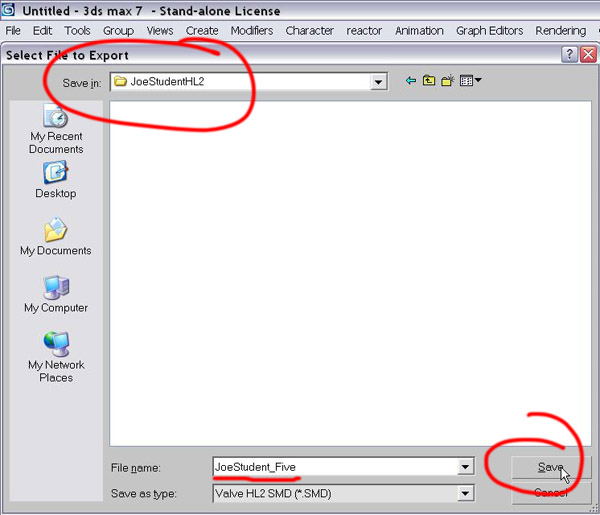
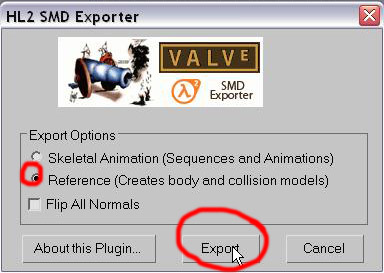
18. Choose Reference and Export.

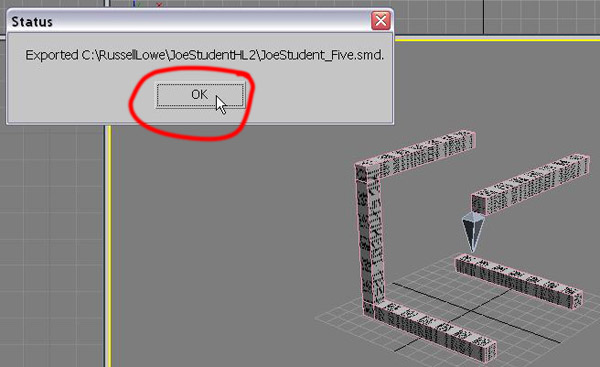
19. Lovely.
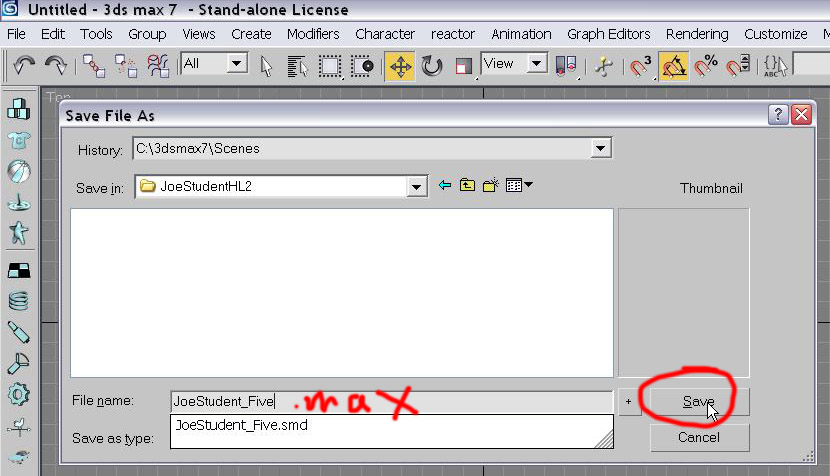
20. Save your 3ds Max 7 file. We'll use it as a template to create the collision model.
21. To create the collision model we'll build a series of new boxes around the reference model. It's important that the verticies for each of the collision volumes don't line up with each other exactly. If they do HL2 reads them as a single vertex with unpredictible results.
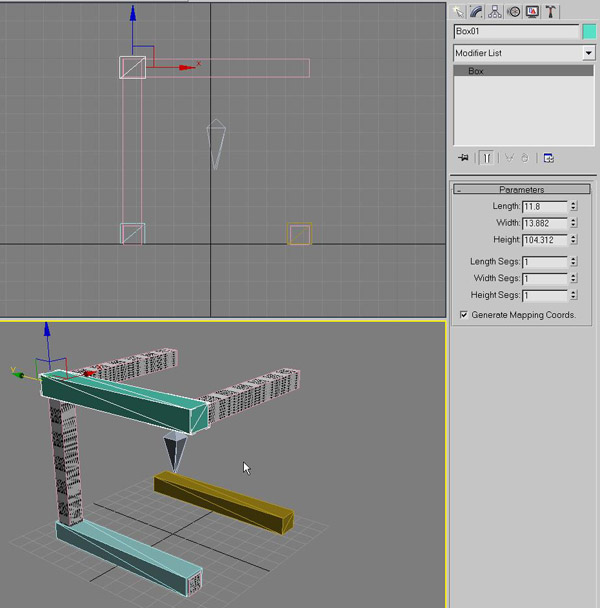
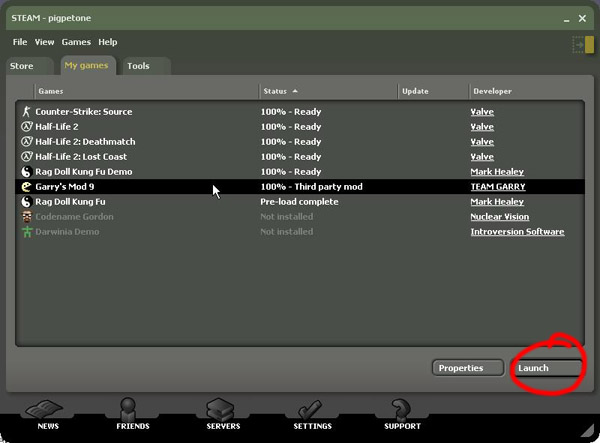
22. Once you've finished makeing a colision volume for each piece of geometry then you can delete the reference model. Notice I've put in an additional collision volume, a mistake I've picked up while writing the tutorial. In the game there will seem to be an invisible obstruction in that area. The collision volumes have to be convex, so nothing like a "C" shape or "torus" for example.
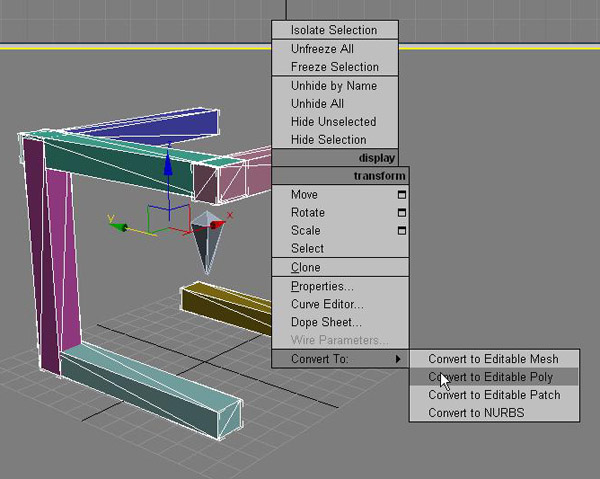
23. Now we do the same steps that we did for the reference model. Convert all of the objects to an editible poly.
24. Attach list. Attach all (except the bone this time, which is left over from the reference model and we'll use again later).

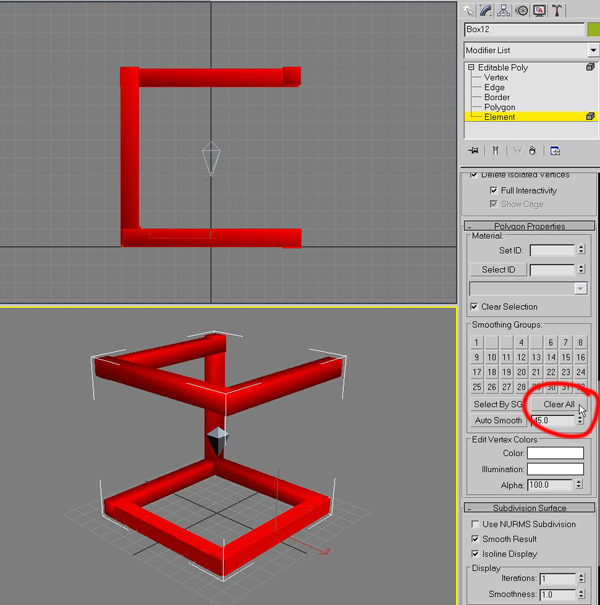
25. Make sure you have "elements" selected under the editible poly rollout and select all of the elements of your object. Then "Clear All" of the "Smoothing Groups".
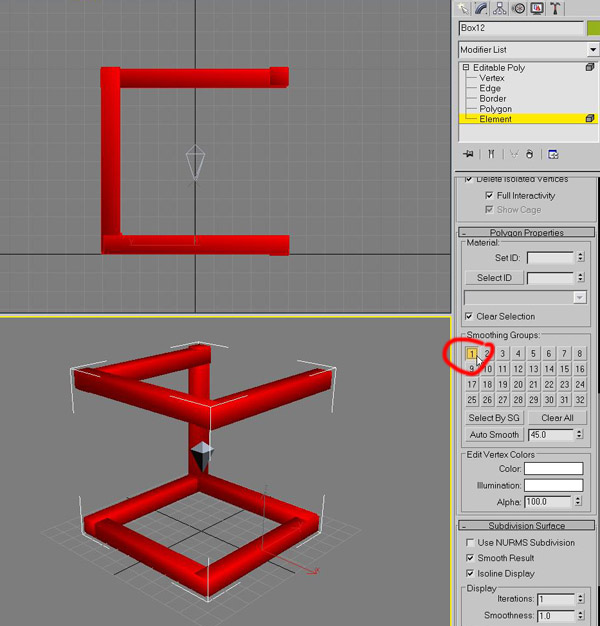
26. Then select Smoothing Groups 1.
27. Assign your material to the collision model and UVW map it.
28. Add a skin modifier to your object.
29. Add the bone.
30. Edit envelope and "envelope' all of the verticies as you did for the reference model.
31. Save the model again, but this time as JoeStudent_Five_Phys.max (so we know this is our physics model).

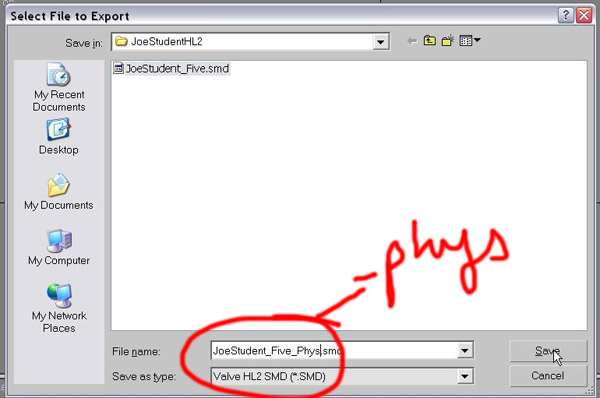
32. Export the physics model.
33. Include _Phys so we know later that this is our physics SMD.
34. 'Reference' (note that you use this one for the body and collision models). 'Export'.
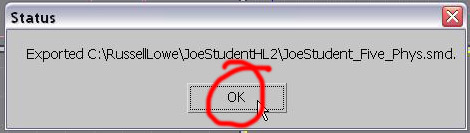
35. Lovely.
36. Now we have our reference and collision SMD's we need to open up steam in preparation for getting them into GarrysMod9. We don't have to launch GMod9 just yet, but steam has to be open so we can use "Cannonfodder's StudioCompiler" to compile them for GMod9.
37. Before we can compile the materials and models for GMod9 we need to create folders for them to compile into. These files have already been created on every machine in rm2.26. Include your last name within name of your files (if you don't do this they may be erased by another user).
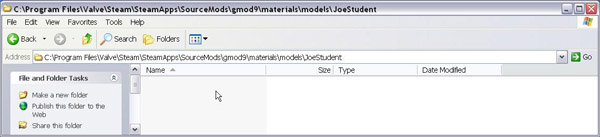
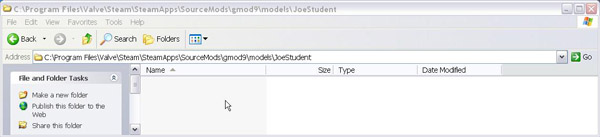
38. And your custom models. Include your last name within name of your files (if you don't do this they may be erased by another user).
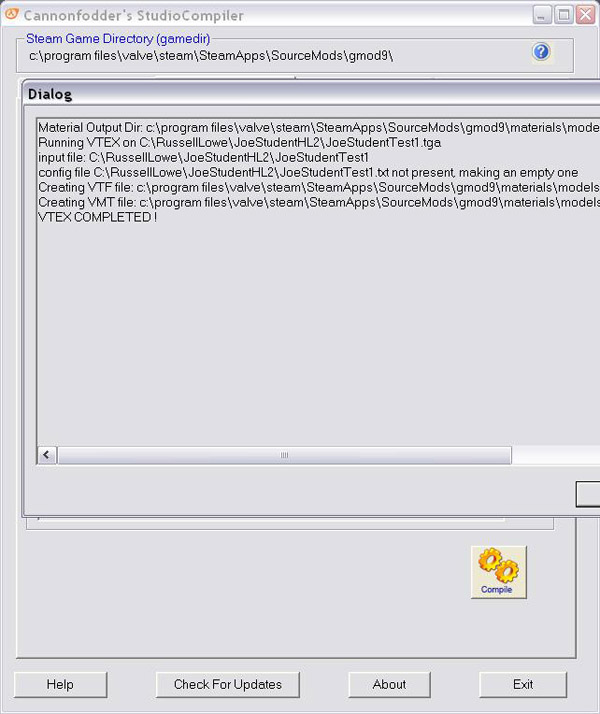
39. Open Cannonfodder's StudioCompiler. Do the Material Compile first. The 'Compiled Material Directory' is where all of your custom textures go. Check the "Prepend materials\models to path" button. Add your TGA file, and Compile.
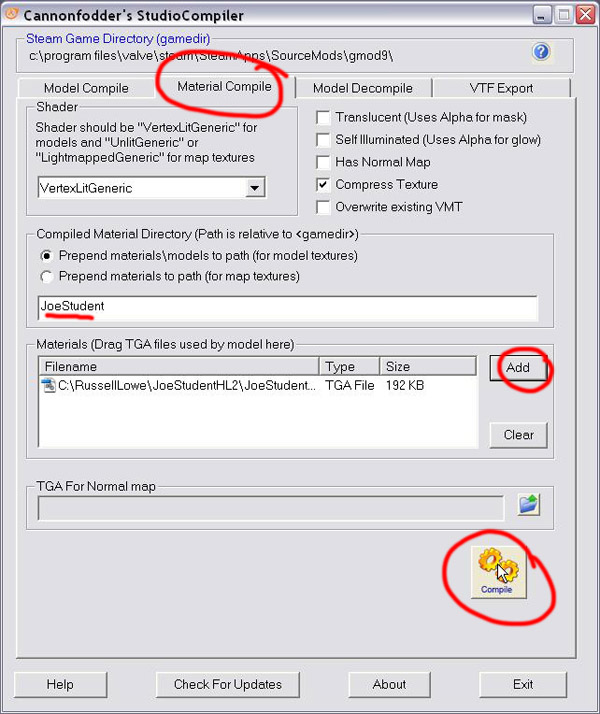
40. The compiler will show you a dialog box detailing the compile process as it creates the VTF and VMT files required to make a material in HL2.
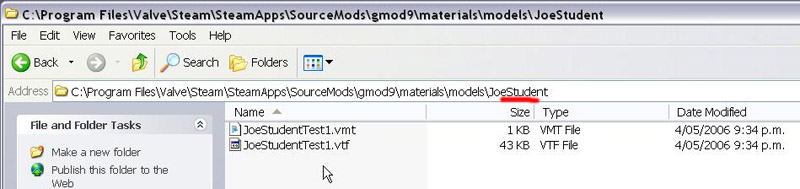
41. Here they are in the "JoeStudent" folder.
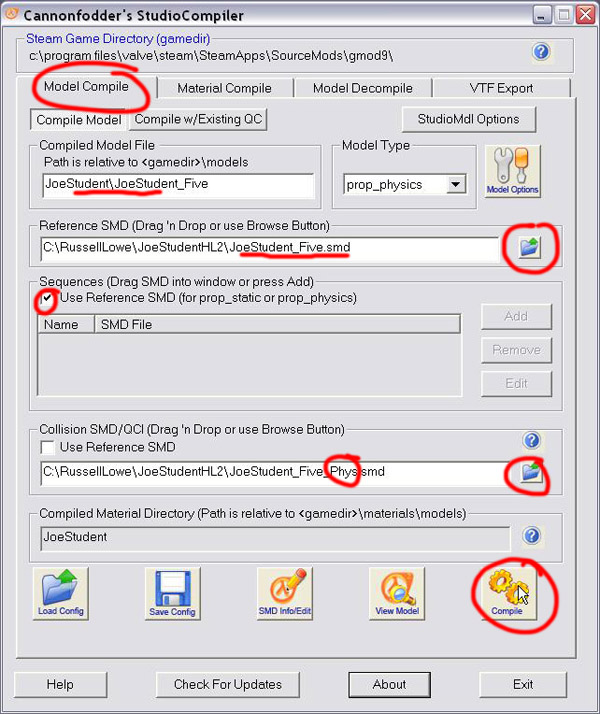
42. Now we'll compile the *.smd files to create the reference and collision models.
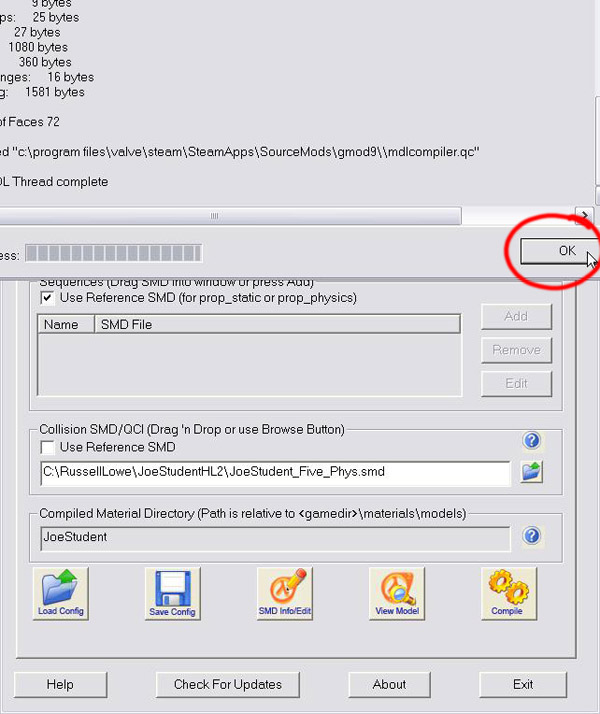
43. Another dialogue box, detailing the compile process. Hit ok once its finished.
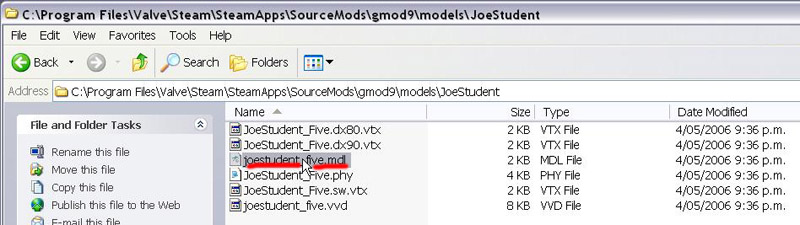
44. Here are the compiled files in your custom models folder. Double click the *.mdl file.
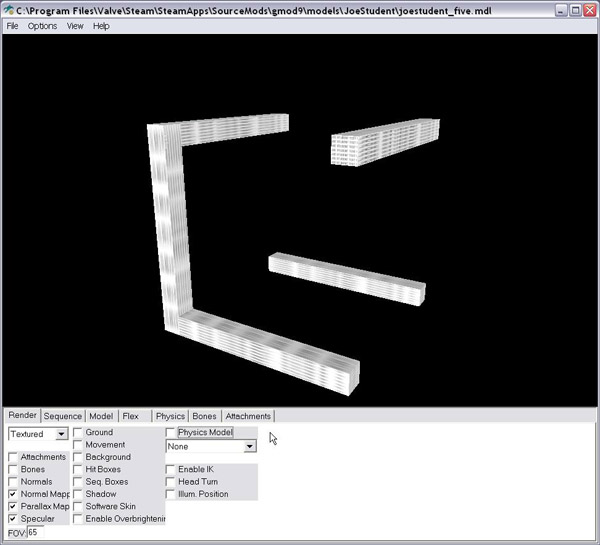
45. The HLMV will open so that you can preview your model.
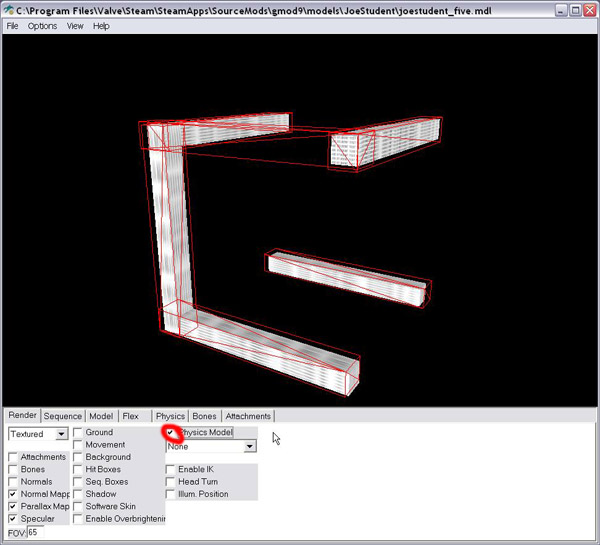
46. Check the physics model box and you'll see a wire frame of the colision volume the model will use in game. If it dosn't match what you had constructed in 3dsMax then its most likely because you missed the smoothing groups step, or verticies from the individual blocks share exactly the same point in space. If the model isn't textured at all, check that you havent changed the materials name while compiling it. If the model has your texture but looks strange check the UVW mapping in 3dsMax.
47. Thats it! Now you can add your custom model to a level using the Hammer editor just as you would any other model i.e. add entity > prop_physics > world model > browse to your custom model.