TUTORIAL: ROTATING RAGDOLL MODEL
FROM 3ds MAX 7 TO GARRYS MOD FOR HL2
This tutorial is written with the assumption that you have already completed the "model with complex collision tutorial" that you can find here. You will need the smd exporter and importer plugins as well as Cannonfodders StudioCompiler installed.
By Russell Lowe
1. Creating a simple model with bones.
2. Skinning the model and exporting the reference, idle and ragdoll *.smd's.
3.
Creating and skinning the collision model and exporting the collision *.smd.
4. Compiling the texture and *.smd's.
5. Creating the custom *qc file.
6. Sample custom *qc. file.
7. Adding your ragdoll model to the 'Q' menu in Gmod9.
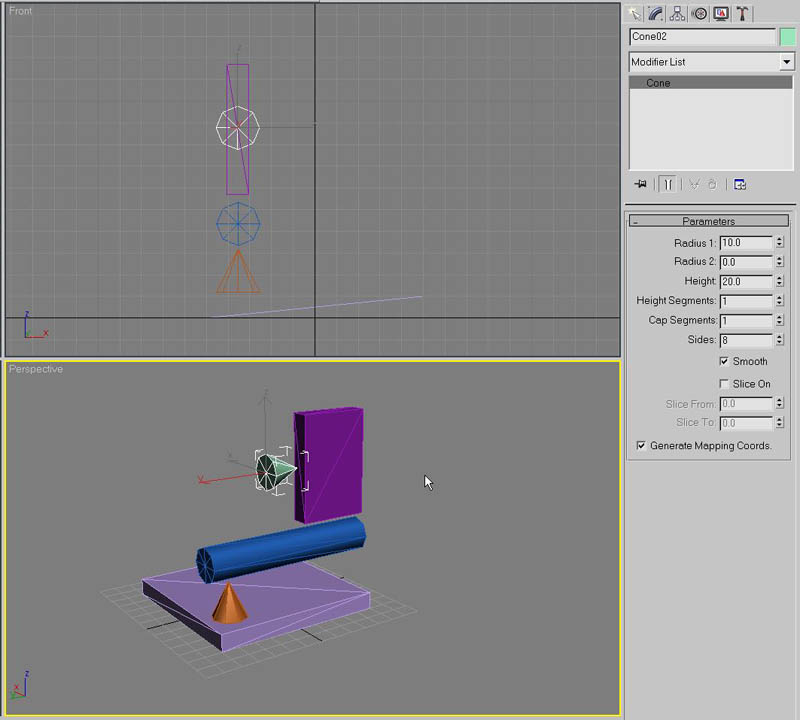
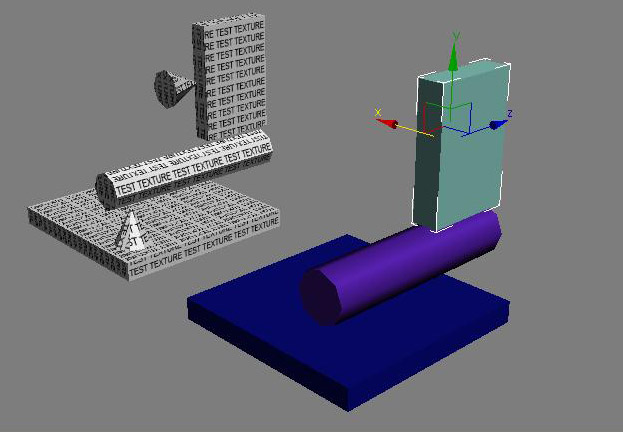
1. Create a simple model with a base and two rotating elements, similar to the one below. Use cone shaped elements to point towards the rotating elements and indicate their axis of rotation.
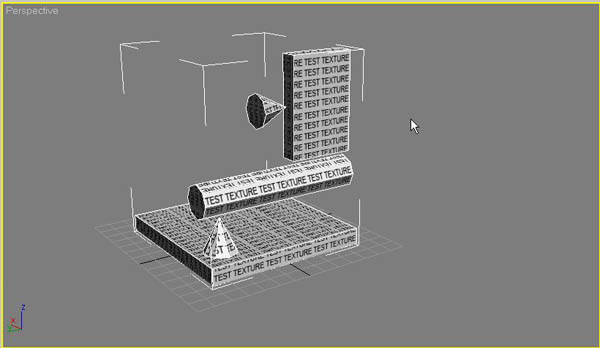
2. Convert the individual objects to editable poly's, attach them all together, apply a texture and UVW map. Collapse the modifier stack once you have applied the UVW map (this 'burns' on the texture coordinates).
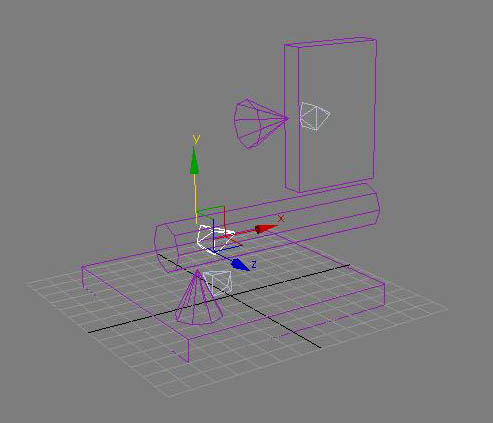
3. Create three bones making sure that the point of each bone lines up with the axis you want it the element to rotate about. It's a good idea to make your bones quite small, you'll see why later. The orientation of the base bone isn't so important because that element won't be rotating.
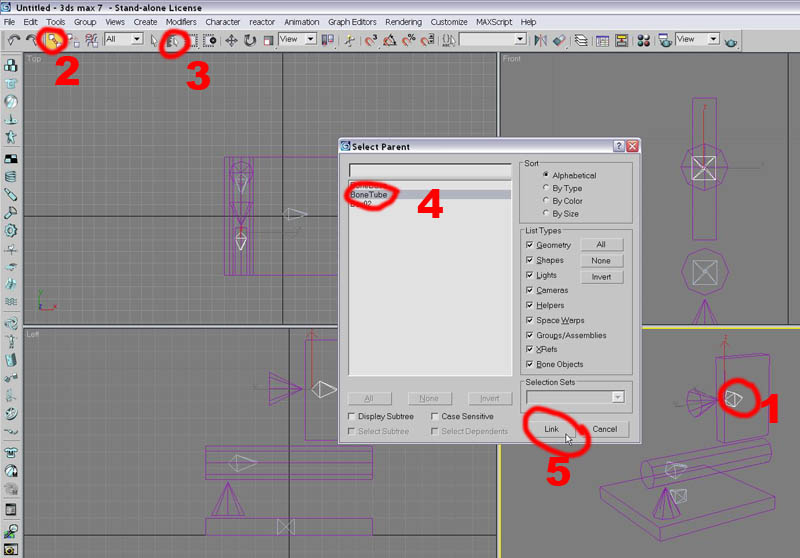
4. We need to establish a hierarchy for our bone 'system' so that the secondary rotating element will follow the primary rotating element. We do this by 'linking' the bones. A bone that follows another bone is called the 'child', the one that leads is called the 'parent'. We start by linking BoneTube to BoneBase.
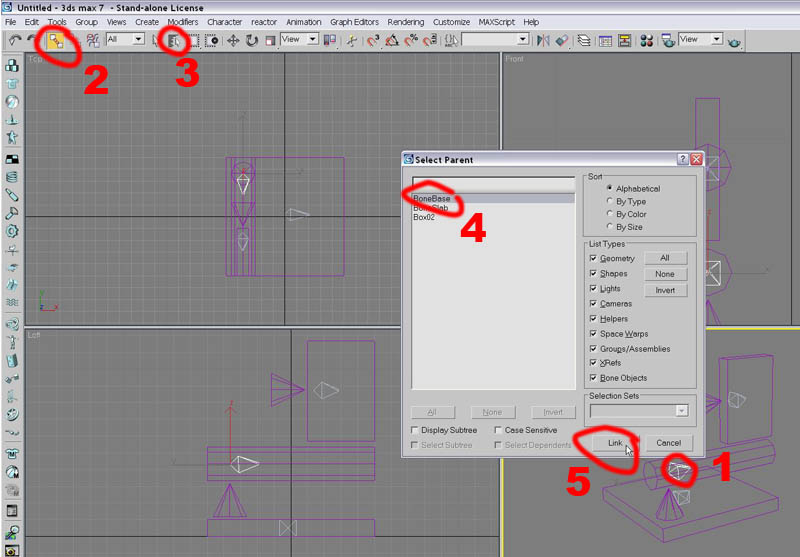
5. Then we link BoneSlab to BoneTube.
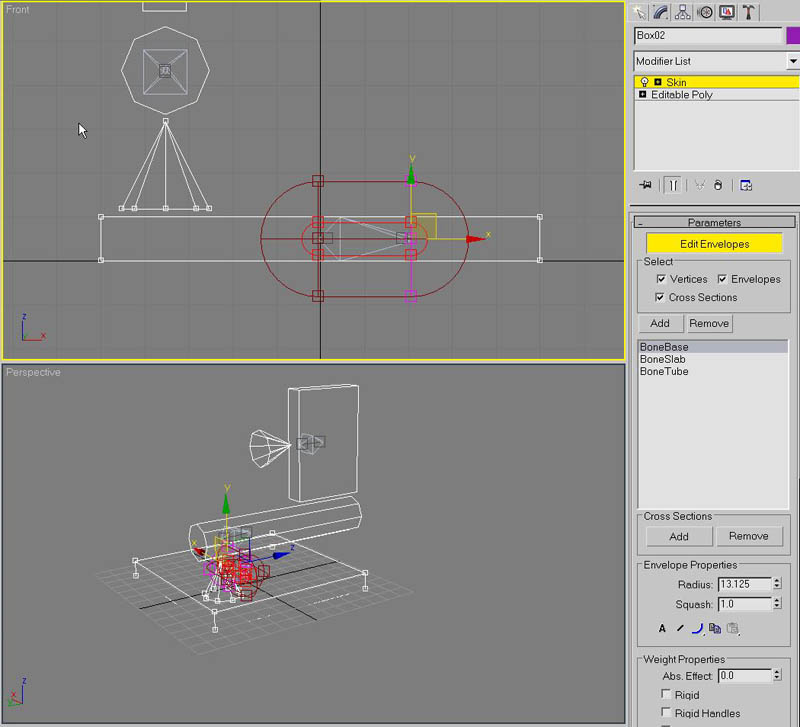
6. Now select your editable poly, apply a skin modifier and add the three bones in your system to the poly's skin.

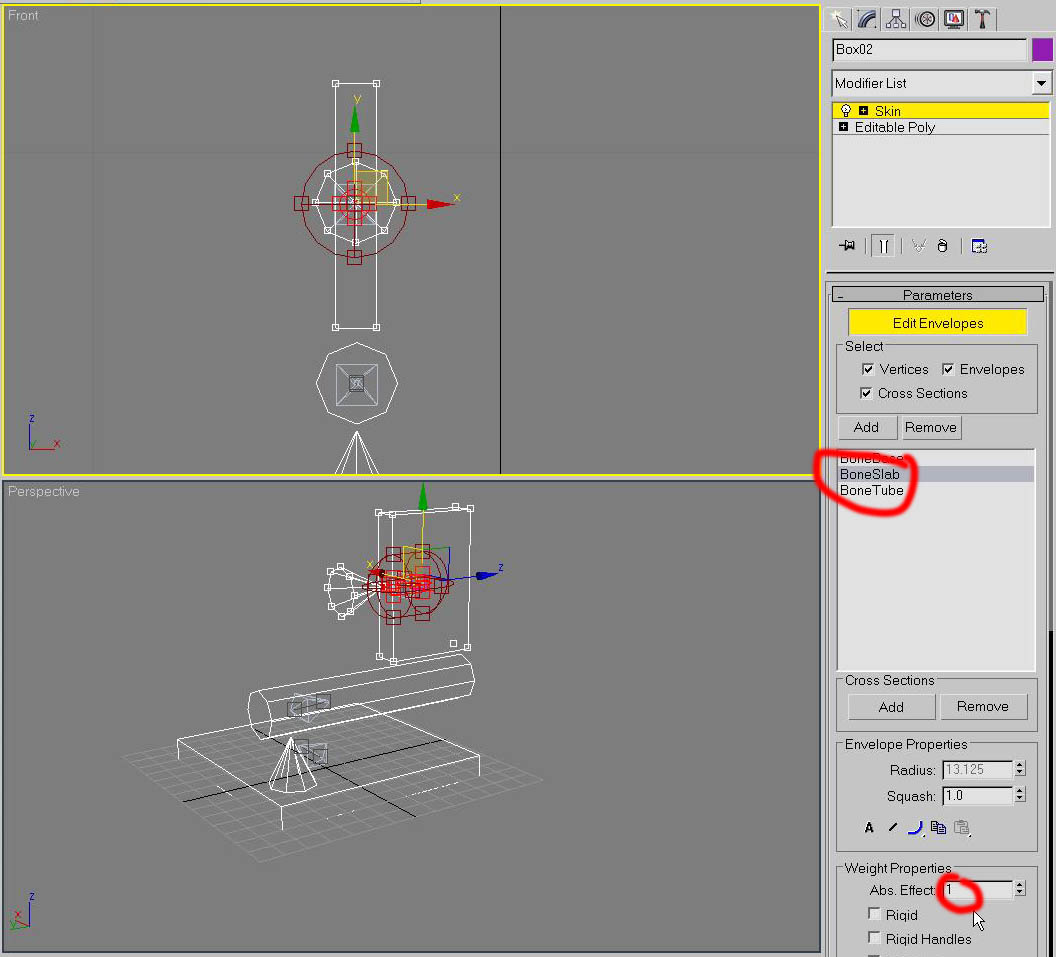
7. You'll need to be quite deliberate during these next few steps as it's easy to get vertices assigned to the wrong bone, or not assigned to any bone at all. Under the parameters section make sure the 'Vertices' checkbox is selected. Instead of adjusting the envelopes we'll select the vertices by dragging a marquee select around a group or holding down Ctrl as we select them individually. Holding down Alt lets you remove vertices from the selection set. I've selected BoneBase and then selected the vertices I wanted to assign to that bone.
8. Under the 'Weight Properties' make the 'Abs. Effect' equal to 1.0. The hollow white boxes representing each vertex should now have a red center indicating they have been assigned.
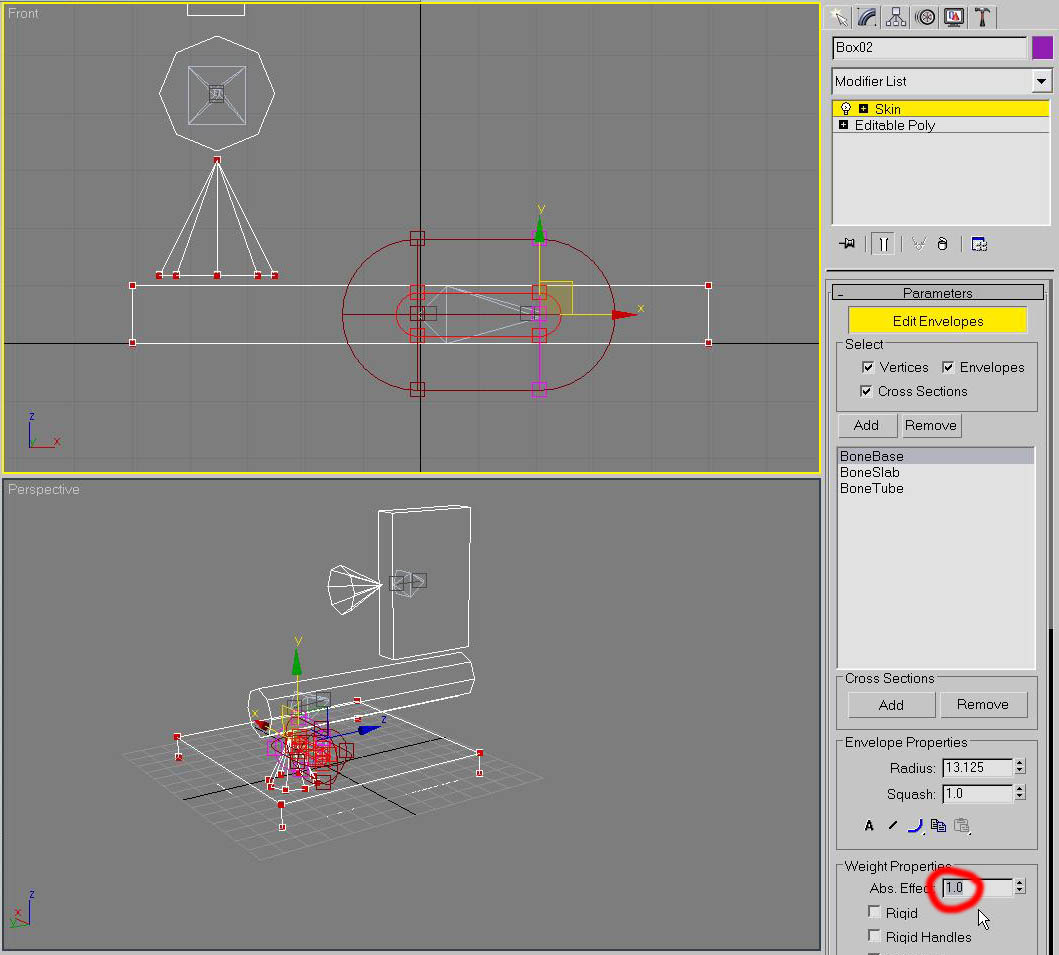
9. Make sure you click in the background so that you have no vertices selected and then move on to assigning the vertices to your next bone. I'm working on BoneTube here. Set the Abs. Effect to 1.0 again.
10. Click in the background so not vertices are selected and assign the last vertices to your last bone. Make Abs. Effect 1.0. All of your poly's vertices have to be assigned to a bone.
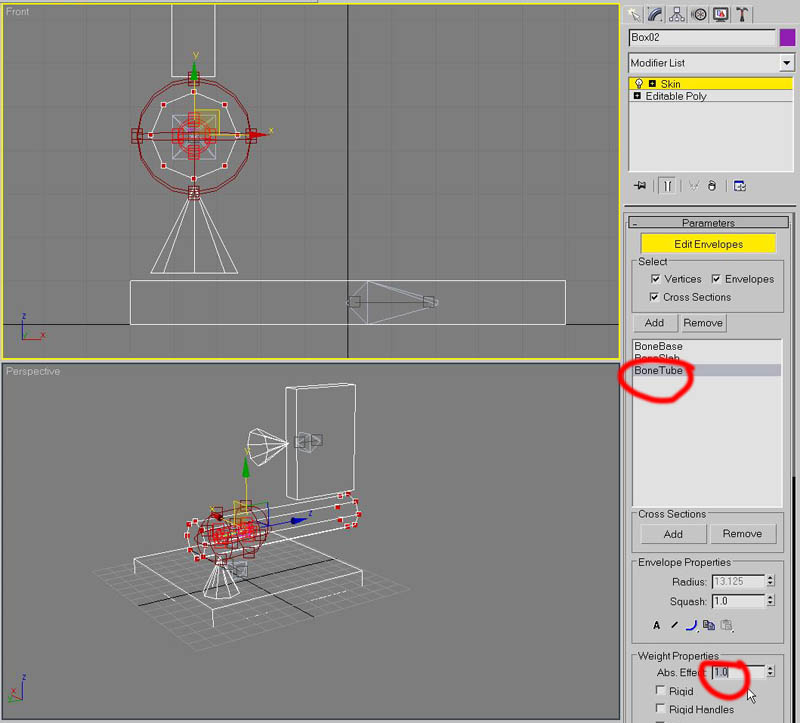
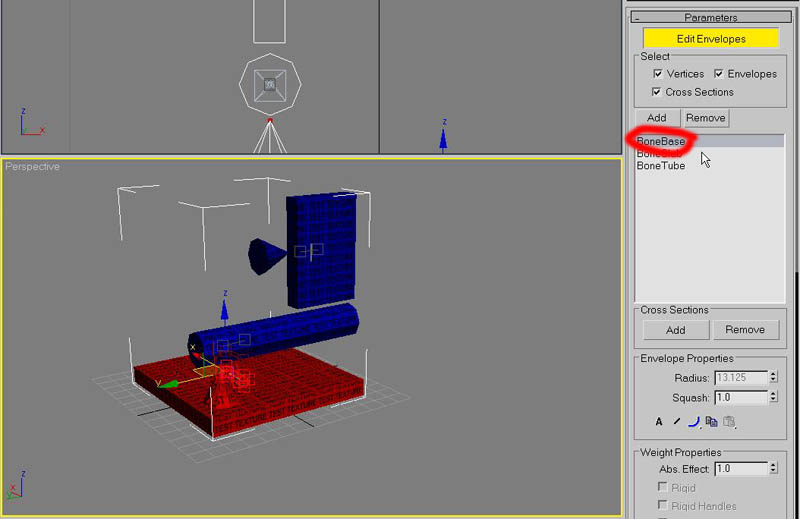
11. In the next three steps I'm just checking that each element of my poly is assigned to the right bone. As you can see they glow red when you have the bone they are assigned to selected.
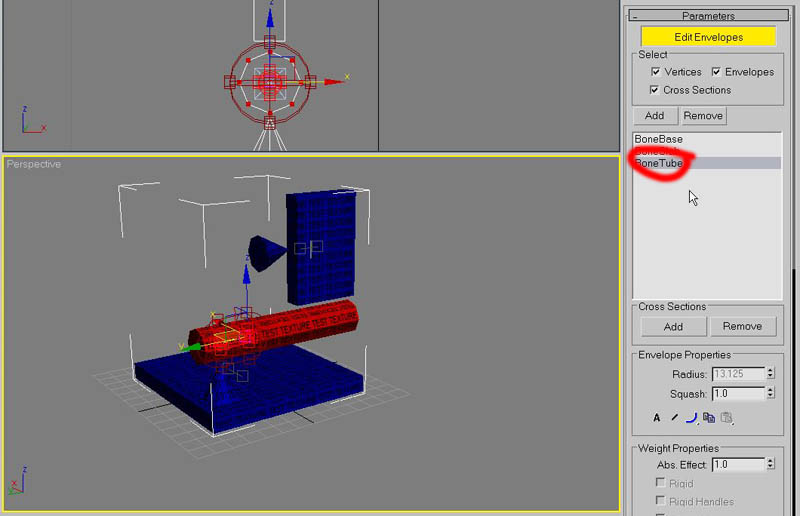
12. BoneTube.
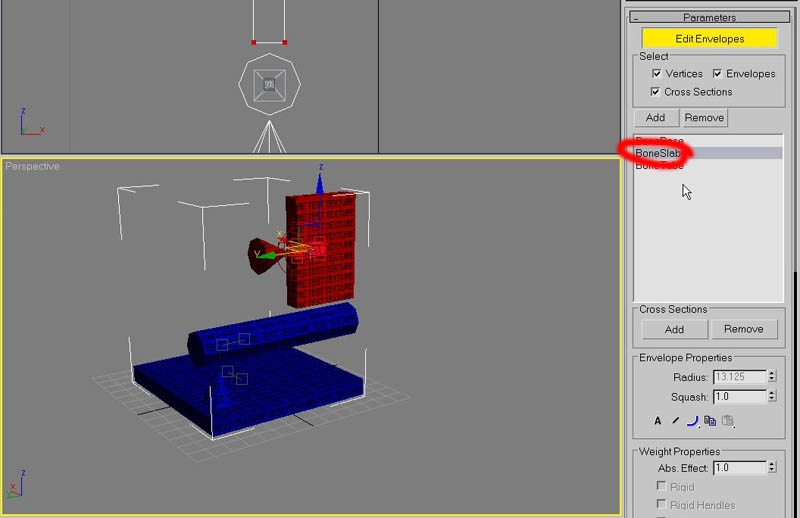
13. BoneSlab.
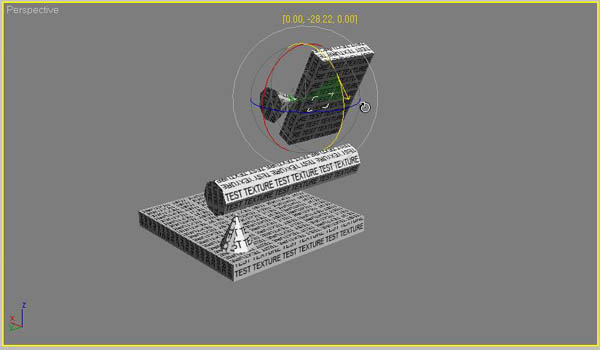
14. Now click in the 'create' panel to stop modifying your poly. Now you can select each bone and rotate then to see their effect. So this is what happens when I rotate the BoneSlab.
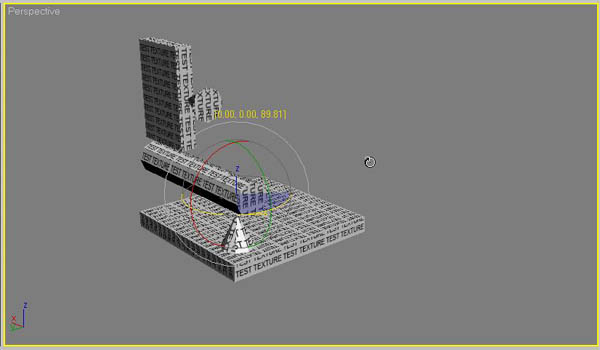
15. And then rotate the BoneTube, notice BoneSlab and its part of the poly follows it around.
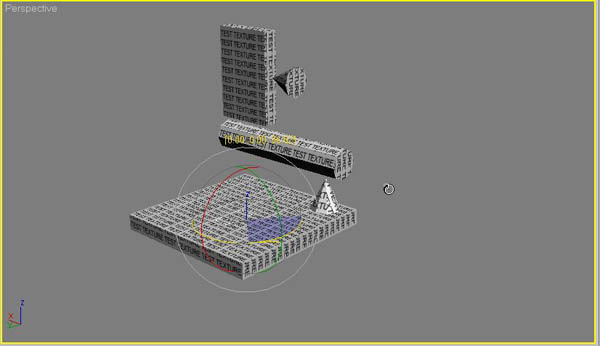
16. And rotating BoneBase takes everything along for the ride.
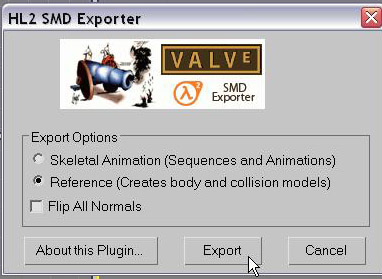
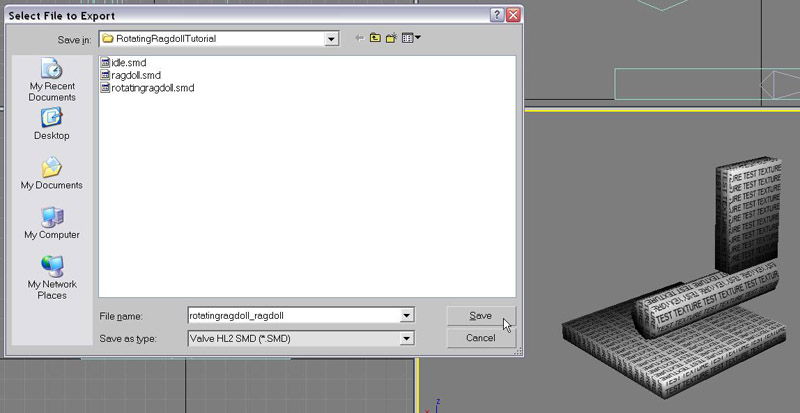
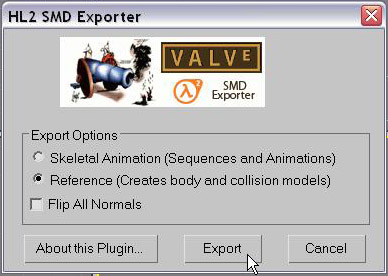
17. Now we need to export three *.smd files. First the Reference .smd.
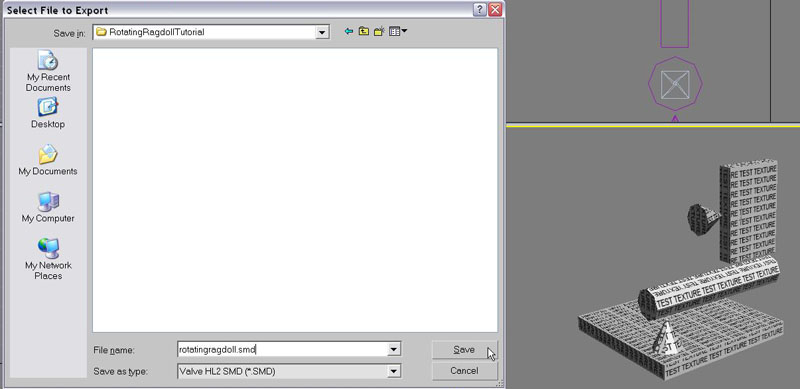
18. Export as 'Reference'.
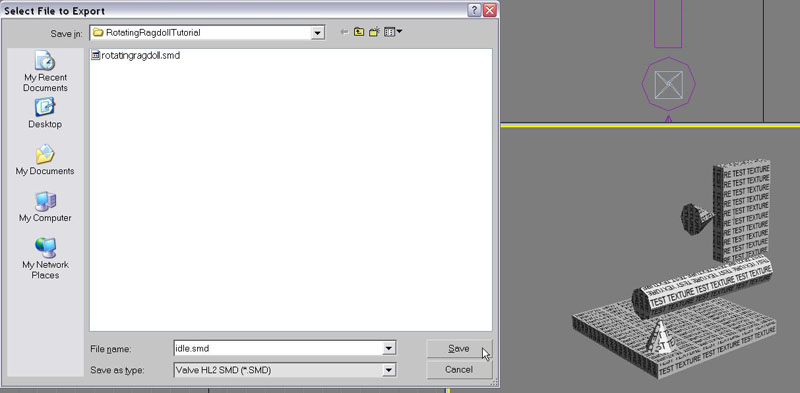
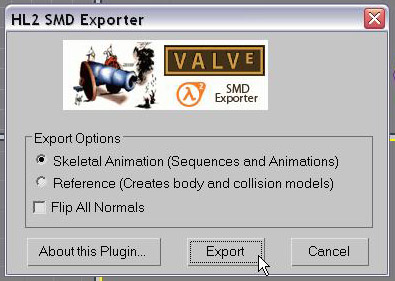
19. Call the second one idle.smd
20. Export as a Skeletal Animation.
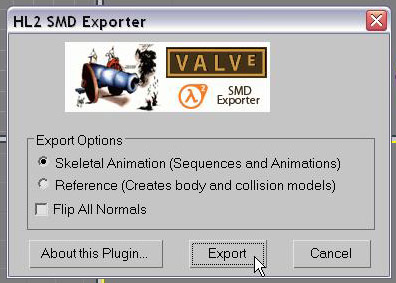
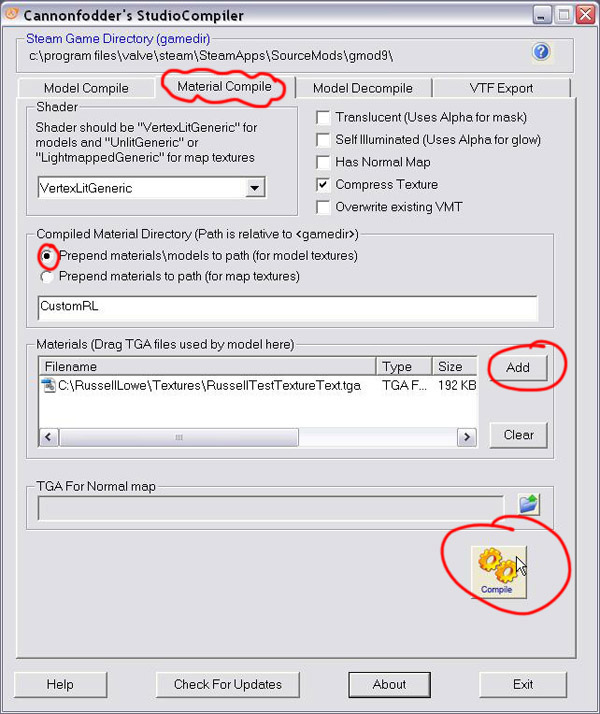
21. Call the third one ragdoll.smd

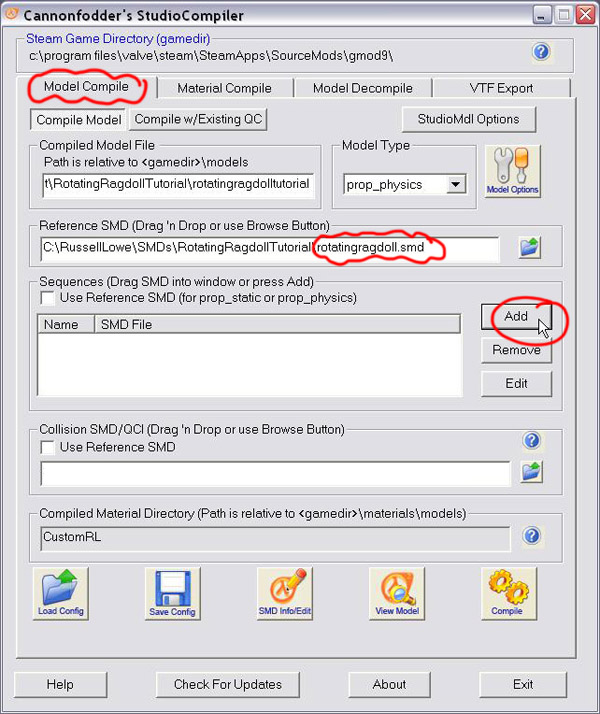
22. Export as a Skeletal Animation.
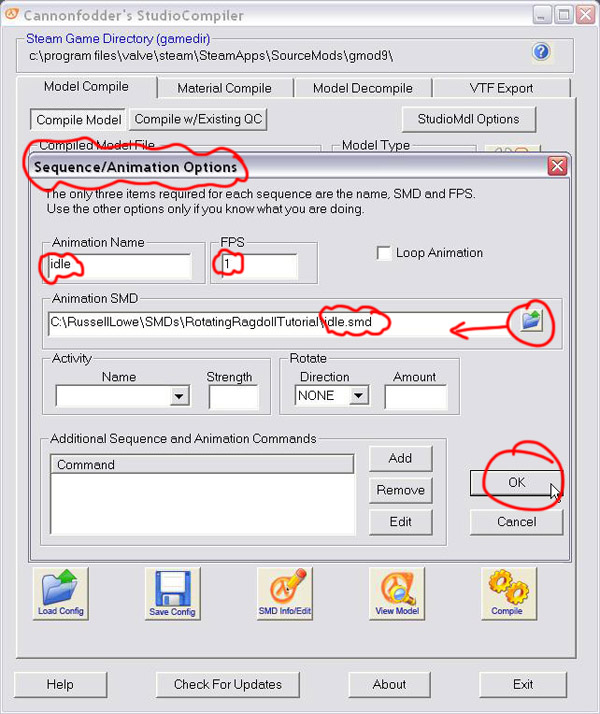
23. Now we need to make the collision model. Use the reference model as a 3d template. Once you've finished save the 3dsmax model, delete the reference mesh (don't delete the bones) and save the 3dsmax model again but include 'collision' in the filename. Notice I haven't included the cones in the collision model, I figure there is still plenty of geometry to collide with and it will make assigning the vertices to the bones easier.
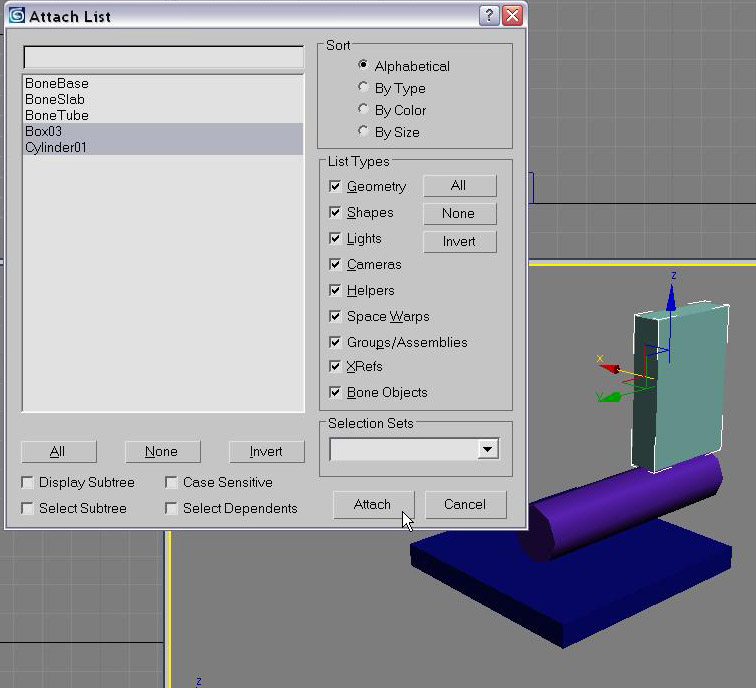
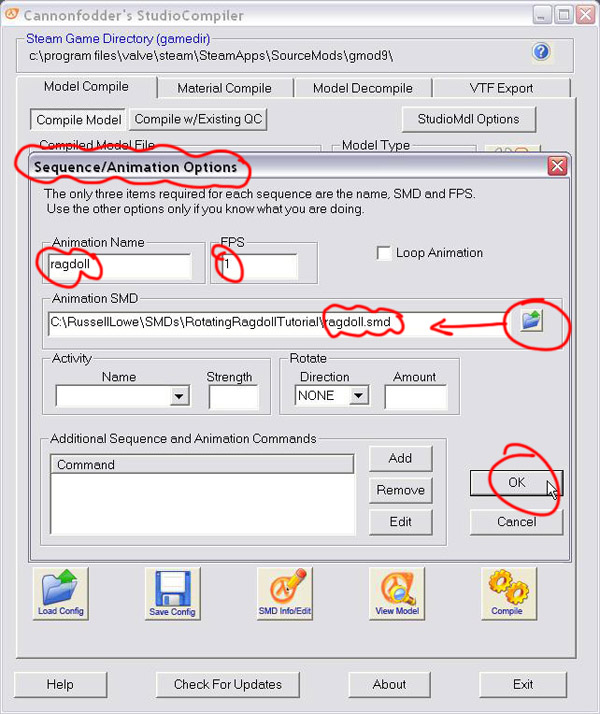
24. Convert the three new elements to editable poly's, then select one and attach the other two to it.
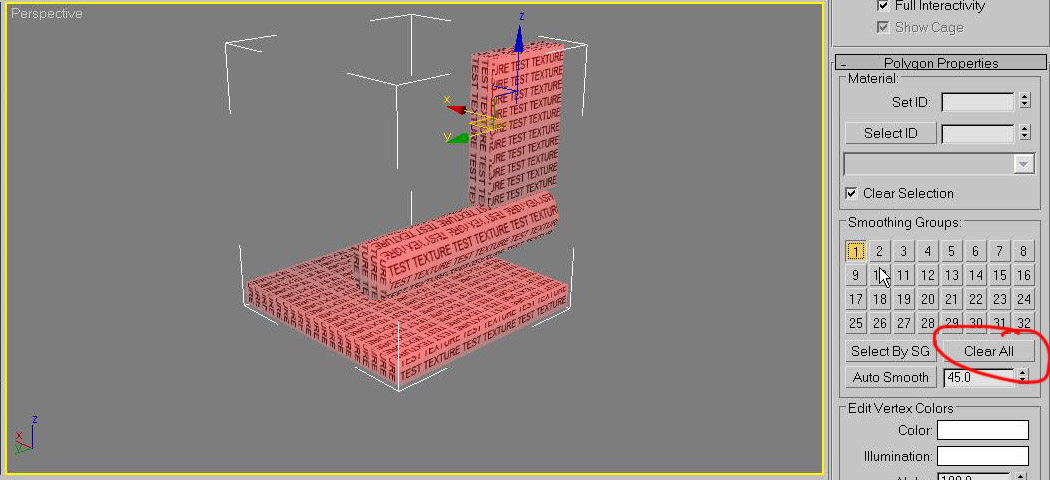
25. Apply a texture, UVW map the model and collapse the modifier stack.
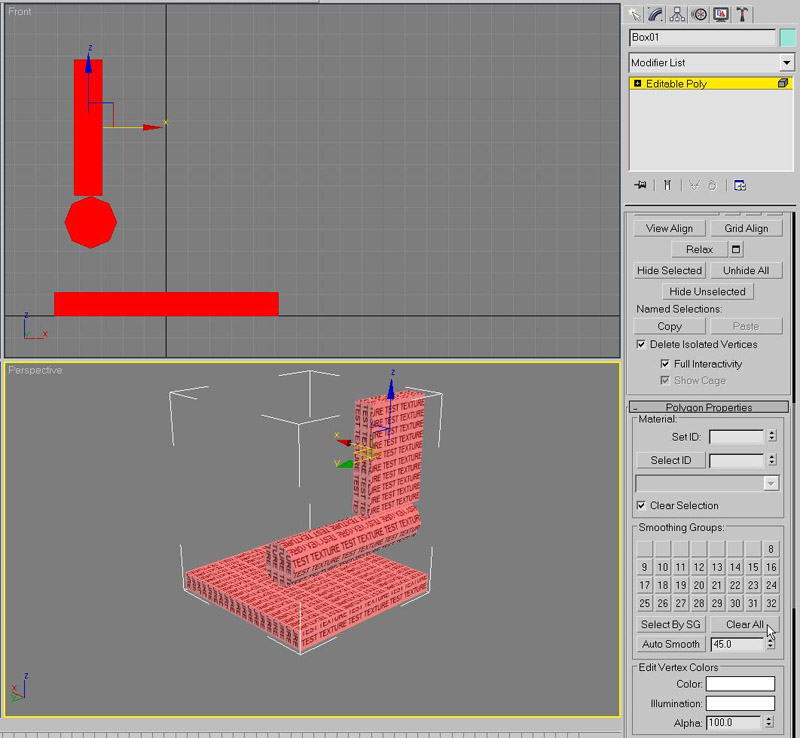
26. Select all of the polygons in the model. 'Clear All' the smoothing groups then select Smoothing Groups 1.
27. Follow steps 6-10 again to skin your mesh, add your bones and assign the vertices to them. Check that each element rotates around the axis you expect.

28. Export the collision model. Use "_ragdoll" at the end of the file name.
29. Export as a Reference model.
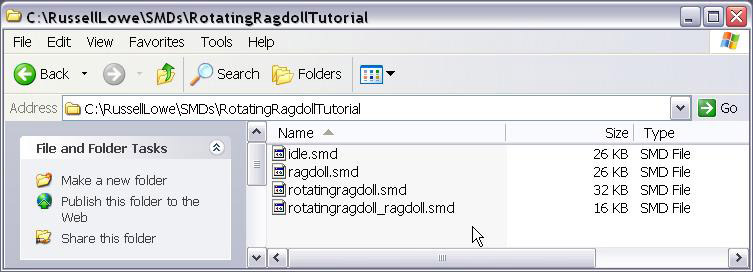
30. You should have four *.smd files saved.
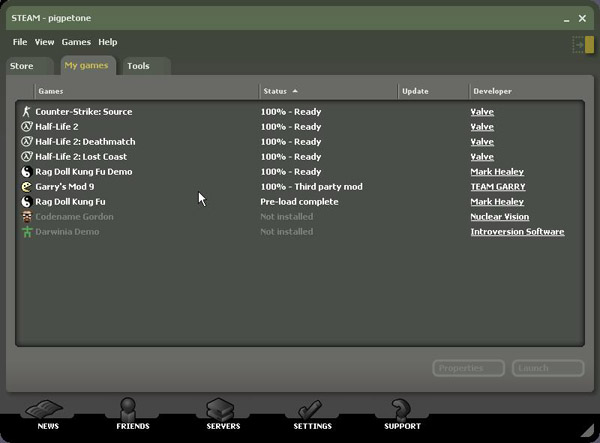
31. Launch Steam.
32. Start with the Material Compile process. Make a new folder in C:\Program Files\Valve\Steam\SteamApps\SourceMods\gmod9\materials\models\JoeStudent called YourLastName_YourModelsName and put JoeStudent\YourLastName_YourModelsName in below where I have CustomRL.
33. Now compile the Model. I created a new folder in C:\Program Files\Valve\Steam\SteamApps\SourceMods\gmod9\models\JoeStudent called RotatingRagdollTutorial but once again, you should include your last name in the file name. In 'Compiled Model File' I called the model I'm creating rotatingragdolltutorial, which is the same as the folder name it's in which could be a little confusing. Browse for your reference .smd. Under 'Sequences' hit Add.
34. Which will open up a 'Sequence/Animation Options' window. Fill it out as below. Browse for your idle.smd, then go OK.
35. Add another one, this time it's your ragdoll sequence you need.
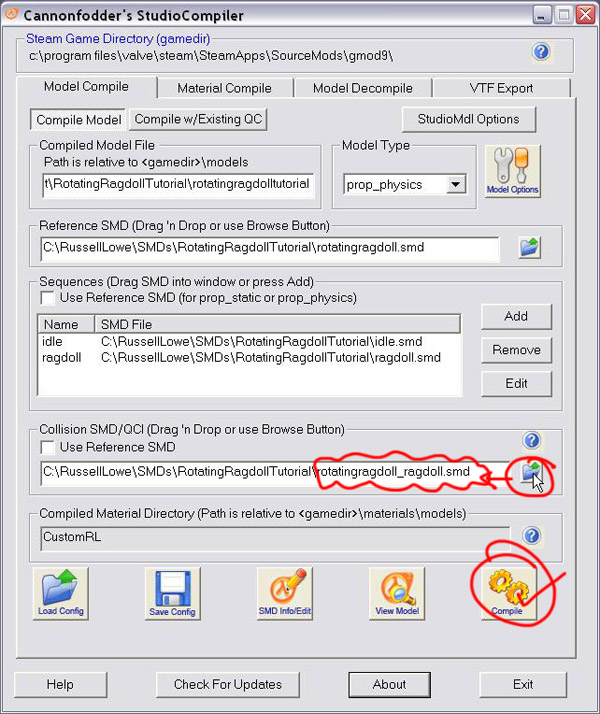
36. Browse for your .smd that ends with "_ragdoll" for the Collision SMD. Then Compile.
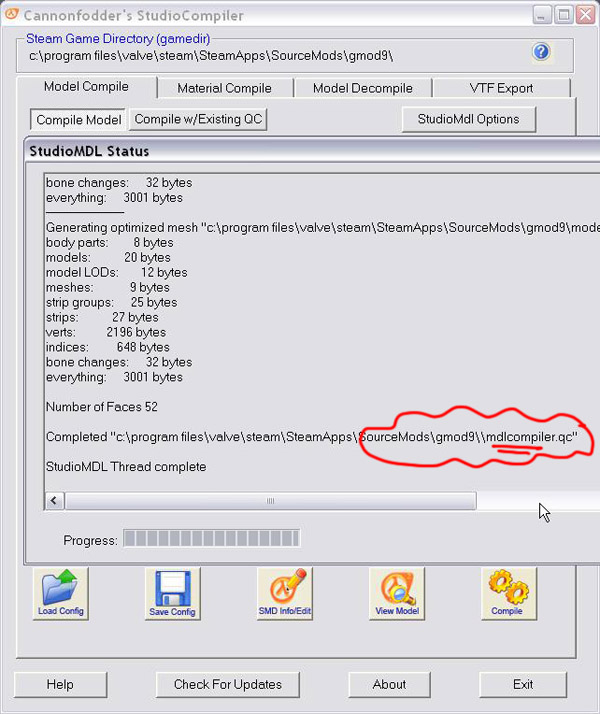
37. Unfortunately that model won't work in the game. We need to 'Compile w/Existing QC' (a custom *.qc file for our custom ragdoll model). We won't start from scratch for this file, we can just modify the one that was just created when we compiled our model in step 36. See below.
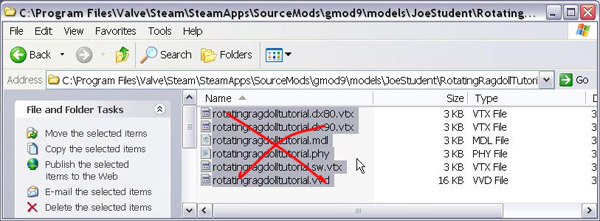
38. First we should delete the files created in step 36.
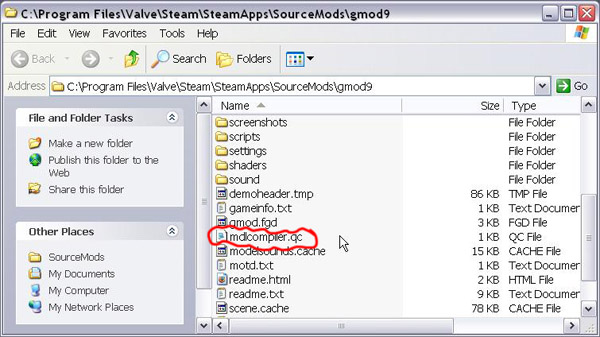
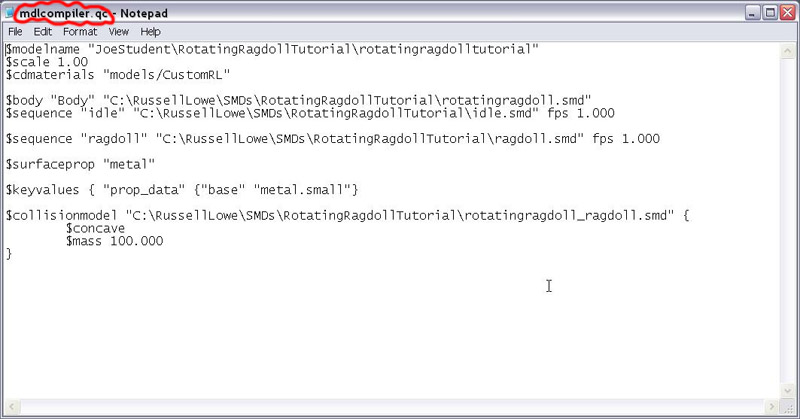
39. Then find the mdlcompiler.qc
40. Open it into Notepad.
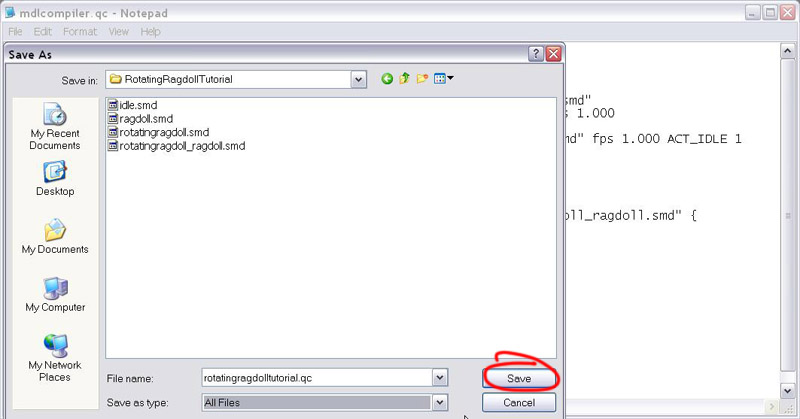
41. File > Save it with your *.smd files for safe keeping.
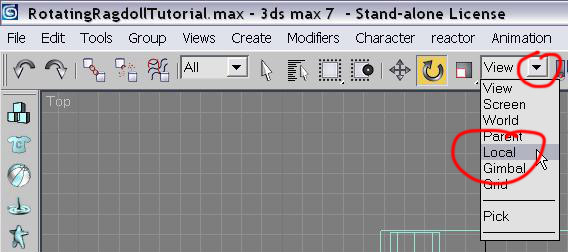
42. Jump back into 3dsMax and change the 'Reference Coordinate System' to Local.
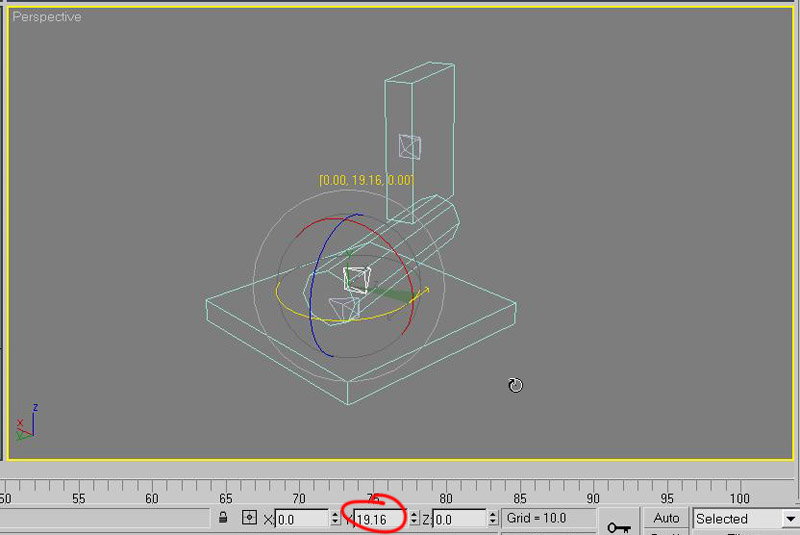
43. Rotate your bones to see which axis' require freedom to move and which axis' need limiting.
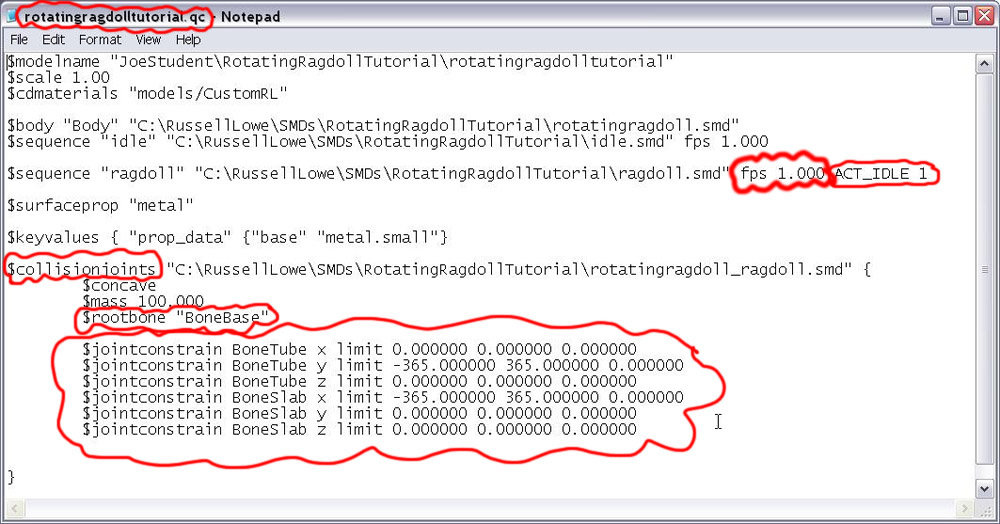
44. Then modify your *.qc file like the below. You'll need an x,y,z limit for each bone. The first two numbers are for the negative and positive rotation direction. I haven't found out what the last number is for yet. Values over 360 let the joint rotate around and around without stopping. Values under 360 limit the degrees of freedom the equivalent amount in that direction.
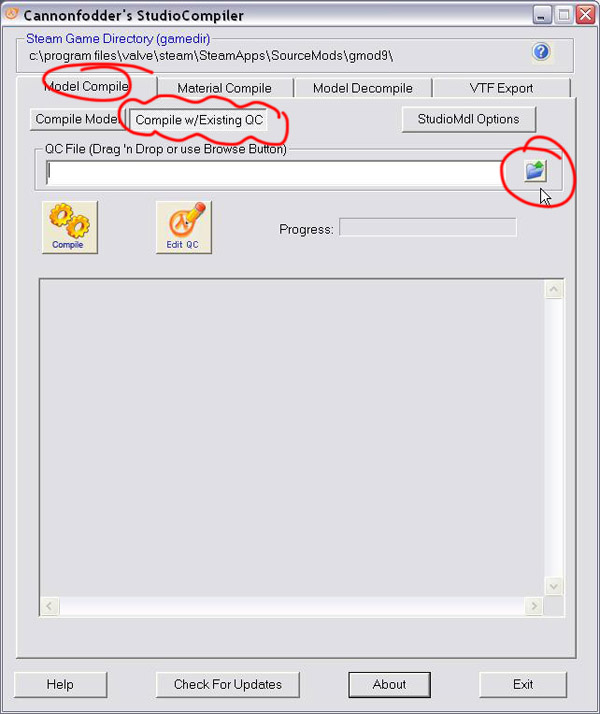
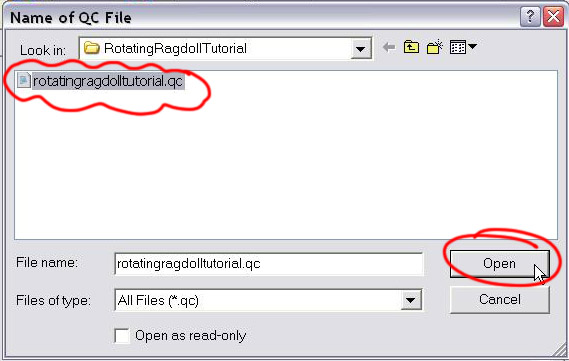
45. Go back to the StudioCompiler and hit the 'Compile w/Existing QC' button. Browse for the custom *.qc file you've just created.
46. Open.
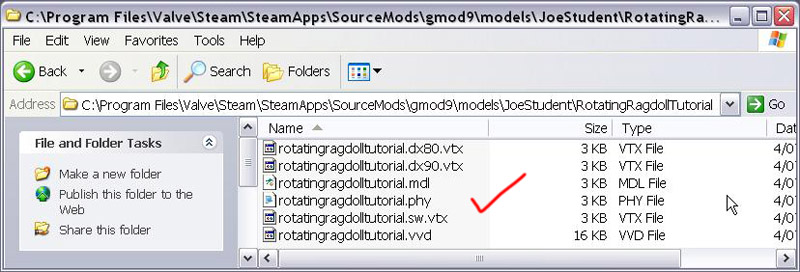
47. When you hit 'Compile' it will create the same set of files that we created in step 36, and saw in step 38. This time though they will work because the *.qc file has created a ragdoll with specific joint rotations.
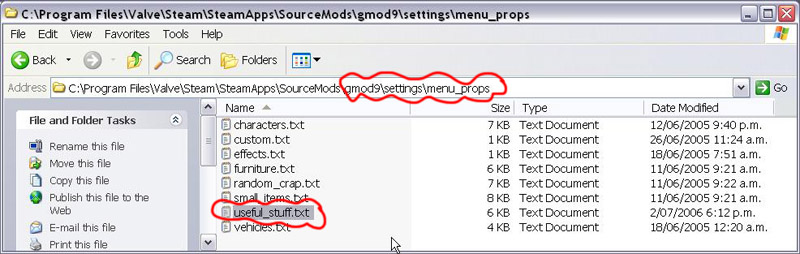
48. That's it! Now you can add your custom model to a level using the Hammer editor just as you would any other model i.e. add entity > prop_physics > world model > browse to your custom model. But if you follow the next three steps you'll be able to select it from the 'Q' menu in Gmod9. So browse to the gmod9\settings\menu_props folder shown below.
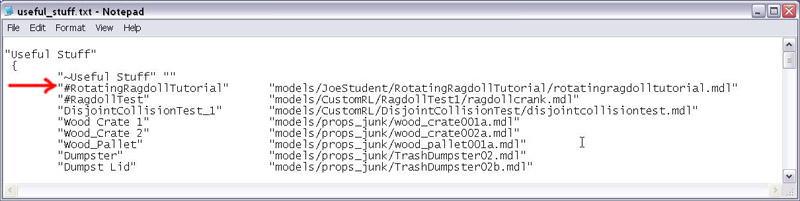
49. Open useful_stuff.txt into Notepad. Create the line indicated, but use your folder and model name details. The '#' symbol tells the game engine that the model is a ragdoll.
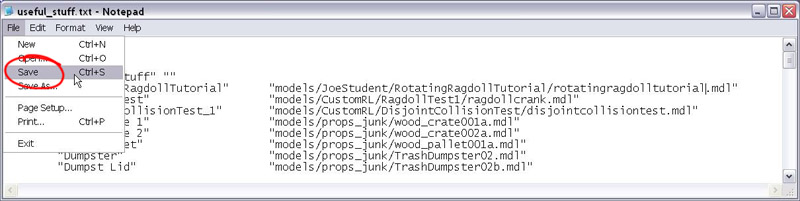
50. Save that back over the original. Save a copy back to your I-Drive, just in case somebody saves over this one on your computer.
51. Launch Gmod9.
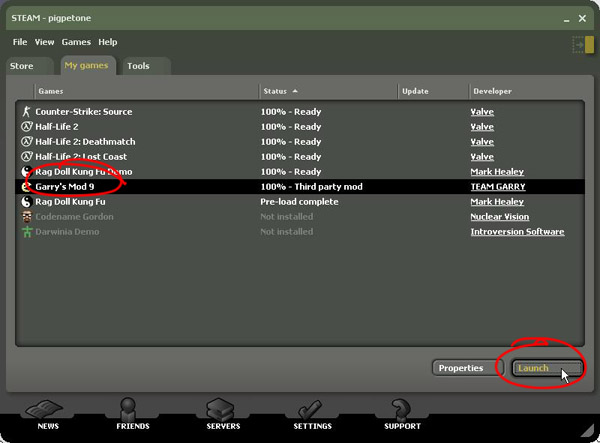
52. And drop it in from the 'Q' menu.
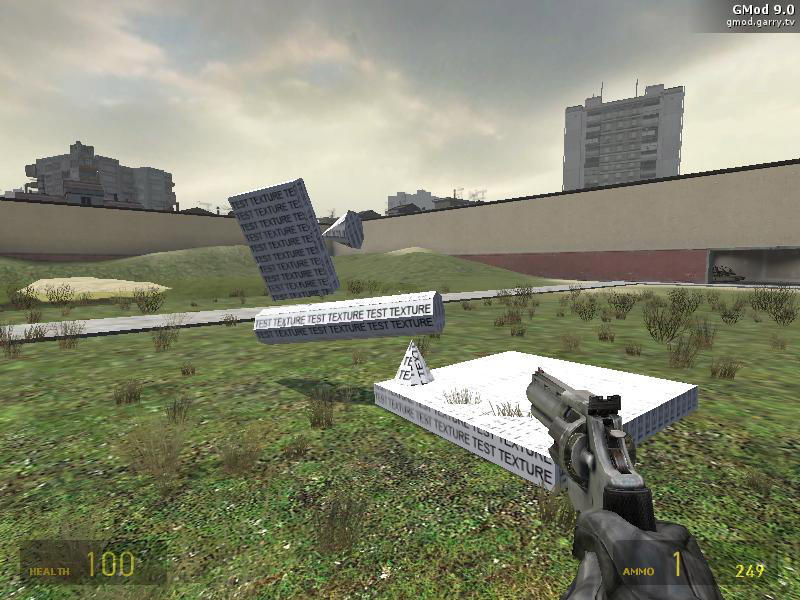
Done! Give yourself a pat on the back, there aren't many people doing this world wide (you can probably guess why). It will become slightly easier with Gmod10, you'll be able to browse for the ragdoll model from the 'Q' menu rather than doing the last three steps. Good aye.